I get lots of questions about actionscript and QuickBox2D. Too many questions to answer really. But if you enter 30 colors into this project I’m working on I’ll help you by answering any question (within reason of course) and possibly giving you a code snippet related to your question.
To enter colors use you’ll be using a simple color picker app. Select a color, give it a name “dark red, maroon” etc.. and Then post in the comments that you did so… You’ll need to enter a contributer name as well… you can use a handle or your real name… doesn’t matter. So go back to this post and watch how to go about adding colors. If you have a question about how to enter stuff, here is the place to ask it….
Lots of people have mentioned that they have problems with QuickBox2D Polygons. The simple solution is not to use the verts 2d array (which is more like how Box2D does polys). So when in doubt about polygons, simply use the points array which will nearly always work as long as the contour you define does not cross over itself. Here is a simple example on wonderfl:
Also... polygons are covered extensively in part two of the tutorial over at active tuts... more on that later.
Here is the timeline code:
Actionscript:
-
import com.actionsnippet.qbox.*;
-
/*
-
0
-
/ \
-
0_0 0
-
| |
-
0-0
-
*/
-
var sim:QuickBox2D = new QuickBox2D(this);
-
sim.createStageWalls();
-
// define the contour of your poly
-
// no limits as long as it doesn't cross over
-
// itself
-
sim.addPoly({x:10, y:5, points:[0.5,0,
-
1, 1,
-
1, 2,
-
0.5, 2,
-
0.5, 1,
-
0,1,
-
0.5,0],
-
wireframe:false});
-
sim.addCircle({x:11, y:10});
-
sim.start();
-
sim.mouseDrag();
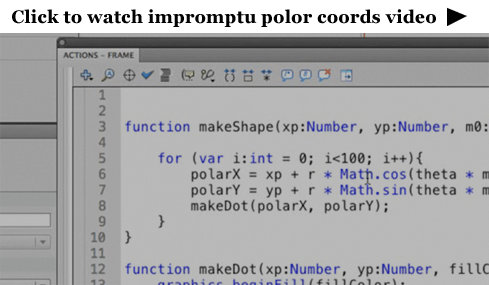
If you're at all interested in watching me free from code. I recorded a video of me coding this snippet (which is about 11 minutes long or so).
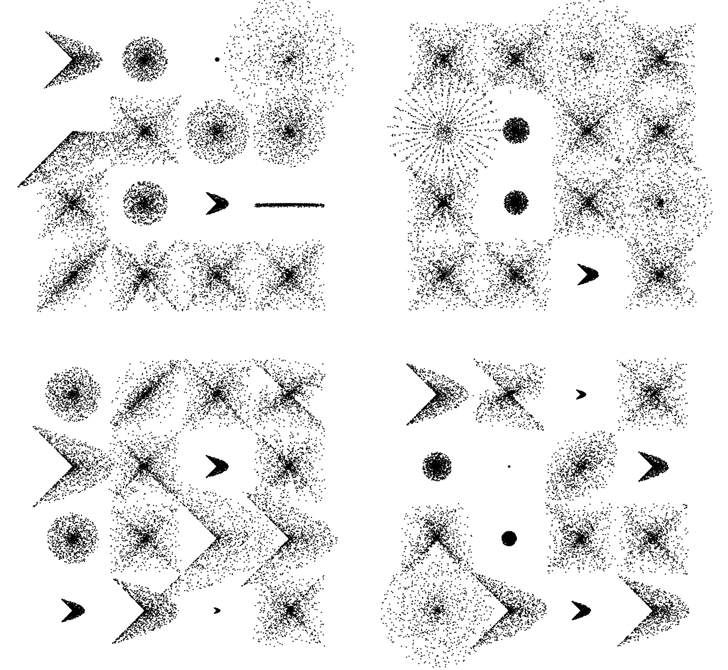
In the video I create a few functions that allow you to draw shapes like these:

Mathematically this stuff is really simple ... the free form nature of the video takes a less technical perspective as you'll see (I even made a few funny mistakes).

Actionscript:
-
[SWF(width = 600, height = 600)]
-
var dotNum:int = 1000;
-
var dotRad:Number = 0.5;
-
-
x = 120
-
y = 100;
-
-
// extra stuff to display what the functions can do
-
stage.addEventListener(MouseEvent.CLICK, onDrawAll);
-
-
function onDrawAll(evt:Event):void{
-
graphics.clear();
-
for (var i:int = 0; i<16; i++){
-
var m:Number;
-
-
var rad:Number = 120;
-
var xp:Number = i % 4 * rad
-
var yp:Number = int(i / 4) * rad
-
-
var type:int = int(Math.random() * 4);
-
if (type == 0){
-
makeShape(xp, yp, rad-60, Math.random() , 1);
-
}else if (type == 1){
-
makeShape(xp, yp, rad-60, 1, Math.random());
-
}
-
else if (type == 2){
-
m = Math.random() * 2;
-
makeShape(xp, yp, rad-Math.random()*120, m, m);
-
}
-
else if (type == 3){
-
m = Math.random() * 2;
-
makeShape(xp, yp, rad-Math.random()*120, m, m/2);
-
}
-
}
-
}
-
-
// main part from the video
-
function makeShape(xp:Number, yp:Number,
-
maxRad:Number = 100,m0:Number=1,
-
m1:Number=1):void{
-
var polarX:Number;
-
var polarY:Number;
-
var radius:Number;
-
graphics.lineStyle(0, 0);
-
var theta:Number = Math.random() * Math.PI * 2;
-
for (var i:int = 0; i<dotNum; i++){
-
radius = Math.random() * maxRad
-
polarX = xp + radius * Math.cos(theta * m0);
-
polarY = yp + radius * Math.sin(theta * m1);
-
theta += 0.1;
-
-
makeDot(polarX, polarY);
-
-
}
-
}
-
-
function makeDot(xp:Number, yp:Number, fillColor:uint = 0x000000):void{
-
graphics.beginFill(fillColor);
-
graphics.drawCircle(xp, yp, dotRad);
-
graphics.endFill();
-
}
Here it is over at wonderf:
This snippet takes xml and builds a multi-tiered navigation based on how nodes are nested etc...:
So that something like this:
XML:
-
var menu:XML=<nav>
-
<element label="one">
-
<element label="a" />
-
<element label="b" />
-
<element label="c" />
-
</element>
-
<element label="two">
-
<element label="three">
-
<element label="aa">
-
<element label="zevan" />
-
</element>
-
<element label="bb" />
-
<element label="cc" />
-
</element>
-
</element>
-
</nav>;
Turns into an expandable and collapsible menu that looks like this:
Here is the timeline code:
Actionscript:
-
var menu:XML=<nav>
-
<element label="one">
-
<element label="a" />
-
<element label="b" />
-
<element label="c" />
-
</element>
-
<element label="two">
-
<element label="three">
-
<element label="aa">
-
<element label="zevan" />
-
</element>
-
<element label="bb" />
-
<element label="cc" />
-
</element>
-
</element>
-
</nav>;
-
-
var elements:Array = new Array();
-
setupMenu();
-
-
function setupMenu():void {
-
parse(menu);
-
// hide child elements
-
for (var i:int = 0; i<elements.length; i++) {
-
var mc:MovieClip = elements[i];
-
if (mc.parents != 1) {
-
removeChild(mc);
-
}
-
}
-
arrangeY();
-
}
-
-
function parse(m:XML):void {
-
for each (var d:XML in m.children()) {
-
makeBtn(d, numParents(d));
-
parse(d);
-
}
-
}
-
-
function makeBtn(d:XML, offsetX:int):void {
-
var btn:MovieClip = new MovieClip();
-
btn.x = offsetX * 20;
-
btn.y = numChildren * 20;
-
btn.data = d;
-
btn.parents = offsetX;
-
btn.value = d.@label;
-
-
var txt:TextField = new TextField();
-
txt.text = d.@label;
-
txt.selectable = false;
-
txt.border = true;
-
txt.width = 100;
-
txt.mouseEnabled = false;
-
txt.height = 19;
-
btn.addChild(txt);
-
btn.buttonMode= true;
-
addChild(btn);
-
-
// store references to btn
-
elements.push(btn);
-
elements[d.parent().@label+"_"+d.@label] = btn
-
-
btn.addEventListener(MouseEvent.CLICK, onClick);
-
}
-
-
function onClick(evt:MouseEvent):void {
-
showHide(MovieClip(evt.currentTarget));
-
arrangeY();
-
trace(evt.currentTarget.value);
-
}
-
-
function showHide(btn:MovieClip, forceHide:Boolean=false):void {
-
for each (var d:XML in btn.data.children()) {
-
var mc:MovieClip = elements[btn.data.@label+"_"+d.@label];
-
if (contains(mc)) {
-
removeChild(mc);
-
showHide(mc, true);
-
} else if (forceHide == false) {
-
addChild(mc);
-
}
-
}
-
}
-
-
function arrangeY():void {
-
var inc:Number = 0;
-
for (var i:int = 0; i<elements.length; i++) {
-
if (contains(elements[i])) {
-
elements[i].y = inc * 20;
-
inc++;
-
}
-
}
-
}
-
-
function numParents(e:XML):int {
-
var num:int = 0;
-
while (e.parent()!= null) {
-
num++;
-
e = e.parent();
-
}
-
return num;
-
}
This is one of those snippets I've had laying around but never got around to posting. Next time I need to do a multi-tiered nav I'll wrap it up into a nice class (the wondeful class was done just by using my script that auto-converts timeline code to doc class code).

