import com.actionsnippet.qbox.*;

[SWF (backgroundColor=0xAA0000, width=700, height=600, frameRate=60)]

var sim:QuickBox2D = new QuickBox2D(this);

sim.createStageWalls();

/**
create a dancing pill
*/
// all x and y coords are relative to the center of the group
var partA:QuickObject = sim.addCircle({x:-1, y:0, radius:0.5, restitution:.9});
var partB:QuickObject = sim.addCircle({x:1, y:0, radius:0.5, restitution:.9});
var partC:QuickObject = sim.addBox({x:0, y:0, width:2, height:1});
// all the parts are passed into the objects array
// addGroup() groups the parts together into one rigid body
var pill:QuickObject = sim.addGroup({objects:[partA, partB, partC], x:3, y:3, angle:0.3});

/**
create another group
*/
partA = sim.addCircle({x:0, y:0, radius:1});
partB = sim.addBox({x:0, y:1, width:1, height:1, fillColor:0x666666});
partC = sim.addBox({x:0, y:-1, width:1, height:1, fillColor:0x666666});
sim.addGroup({objects:[partA, partB, partC], x:8, y:3, angle:0.3});

/**
create two circles linked together by a stretchy joint
*/
partA = sim.addCircle({x:15, y:3, fillColor:0x000000, anglularDamping:1});
partB = sim.addCircle({x:17, y:3, fillColor:0xFFFFFF, anglularDamping:1});
// if x1, y1, x2 and y2 properties are not set, the joint is automatically placed
// at the b2Body's center
sim.addJoint({a:partA.body, b:partB.body, frequencyHz:1});

sim.start();
sim.mouseDrag();
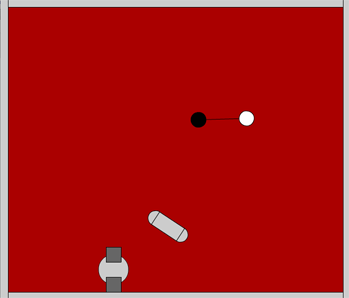
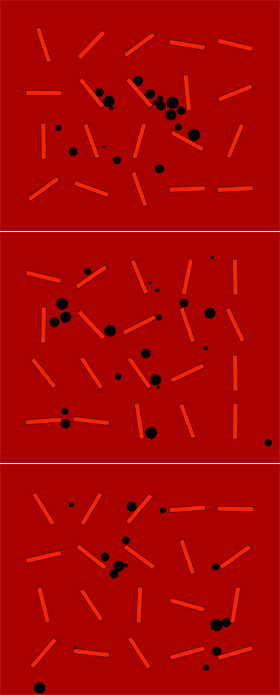
You’ll need QuickBox2D Alpha 106 to run this… This snippet demo’s the addGroup() method, which allows for easy grouping of shapes. I updated the docs today to feature a simple explanation of how this works.
import com.actionsnippet.qbox.*;

[SWF(backgroundColor=0x000000, width=700, height=600)]

var sim:QuickBox2D = new QuickBox2D(this);

sim.setDefault({fillColor:0x003366, lineColor:0x2B80D5});
sim.createStageWalls();

var i:int = 0;
for (i= 0; i<10; i++){
  sim.addCircle({x:5 + i, y:7, radius:0.3, linearDamping:1, angularDamping:1, fillColor:0x78B4C2, isBullet:true});
}

for (i= 0; i<2; i++){
	var poly:Array = [];
	var r:Number = 3;
	var step:Number = Math.PI / 6;
	for (var t:Number = 0; t<=Math.PI; t+=step){
		poly.push(r * Math.cos(t));
		poly.push(r * Math.sin(t));
	}
	r = 2;
	for (t = Math.PI; t >= -step; t-=step){
		poly.push(r * Math.cos(t));
		poly.push(r * Math.sin(t));
	}
	// using points instead of verts causes QuickBox2D to triangulate the polygon
	// the wireframe boolean changes rendering style for polys
	sim.addPoly({x:4 + i *7, y:16, points:poly, wireframe:Boolean(i), linearDamping:1.5, angularDamping:1});
}

sim.start();
sim.mouseDrag();
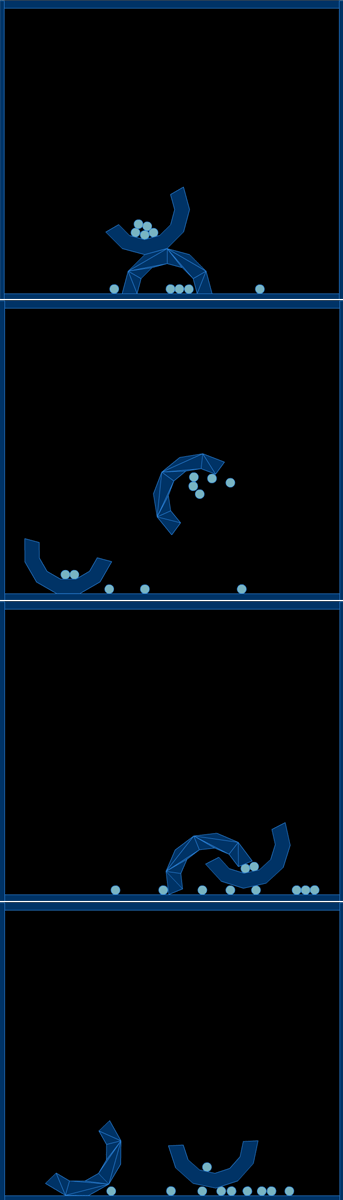
I just uploaded QuickBox2D Alpha 106 which includes a few bug fixes and support for compound shapes and easier polys. I used the algorithm from yesterdays post to significantly simplify the way QuickBox2D handles the description of polygons.
You’ll need QuickBox2D Alpha 106 or greater, if you want to test this….
This triangulation is really better suited for 3D stuff – Box2D supports multiple convex polygons in one rigid body… this algorithm makes more shapes (triangles) than Box2D needs – I’ll probably swap out the algorithm in the near future.
Tomorrow I’ll be posting a demo about the way QuickBox2D simplifies compound shapes. I have yet to update the docs to include the new features of Alpha 106. That will happen along with tomorrows post.
var triangulate:Triangulate = new Triangulate();

var poly:Array=[];

stage.addEventListener(MouseEvent.MOUSE_DOWN, onDown);
function onDown(evt:MouseEvent):void {
	poly.push(new Pnt(mouseX, mouseY));
}

addEventListener(Event.ENTER_FRAME, onLoop);
function onLoop(evt:Event):void {
	var i:int;
	graphics.clear();
	var verts:Array=triangulate.process(poly);

	if (verts==null) {
		// draw a red polygon if there is some kind of error,
		// or if there are too few points on the poly
		if (poly.length>1) {
			graphics.lineStyle(0,0xFF0000);
			graphics.moveTo(poly[0].x, poly[0].y);
			for (i = 1; i<poly.length; i++) {
				graphics.lineTo(poly[i].x, poly[i].y);
			}
		}
	}else{
		// draw the triangulated polygon
		var tcount:int = verts.length / 3;
		graphics.lineStyle(0,0x000000);
		for (i = 0; i<tcount; i++) {
			var index:int = i * 3;
			var p1:Pnt=verts[index];
			var p2:Pnt=verts[index+1];
			var p3:Pnt=verts[index+2];
			graphics.moveTo(p1.x,p1.y);
			graphics.lineTo(p2.x,p2.y);
			graphics.lineTo(p3.x,p3.y);
			graphics.lineTo(p1.x,p1.y);
		}
	}
}
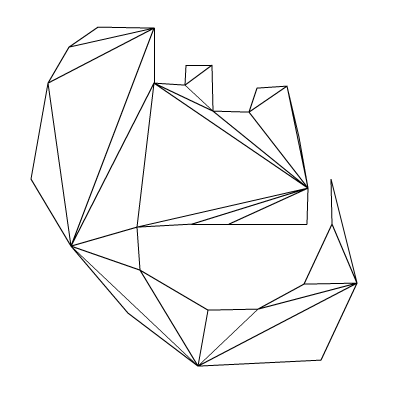
The above demo’s a class that triangulates a polygon given a list of points. To test this snippet you’ll need the Pnt and Triangulate Classes, which you can download or copy from below.
Polygon triangulation is useful for lots of things… I first found that I needed it back in my Director days. I wanted to be able to draw a polygon and then extrude it into 3D space – in order to do this I needed to triangulate the polygon that was drawn. Luckily there was an undocumented feature in Lingo that did the triangulation. I’ll probably do an extrusion demo soon. I’ve been looking into this to make the QuickBox2D polygon stuff a little easier.
/**
This code is a quick port of code written in C++ which was submitted to
flipcode.com by John W. Ratcliff  // July 22, 2000
See original code and more information here:
http://www.flipcode.com/archives/Efficient_Polygon_Triangulation.shtml

ported to actionscript by Zevan Rosser
www.actionsnippet.com
*/

package {

	public class Triangulate {

		private const EPSILON:Number = 0.0000000001;

		public function Triangulate(){}

		public function process(contour:Array):Array{
			var result:Array = [];
			var n:int = contour.length
			if ( n < 3 ) return null

			var verts:Array = [];

			  /* we want a counter-clockwise polygon in verts */
			var v:int

			  if ( 0.0 < area(contour) ){
				for (v=0; v<n; v++) verts[v] = v;
			  }else{
				for(v=0; v<n; v++) verts[v] = (n-1)-v;
			  }

			  var nv:int = n;

			  /*  remove nv-2 vertsertices, creating 1 triangle every time */
			  var count:int = 2*nv;   /* error detection */
			 var m:int;
			  for(m=0, v=nv-1; nv>2; )
			  {
				/* if we loop, it is probably a non-simple polygon */
				if (0 >= (count--)){
				  //** Triangulate: ERROR - probable bad polygon!
				 // trace("bad poly");
				  return null;
				}

				/* three consecutive vertices in current polygon, <u,v,w> */
				var u:int = v; if (nv <= u) u = 0;     /* previous */
				v = u+1; if (nv <= v) v = 0;     /* new v    */
				var w:int = v+1; if (nv <= w) w = 0;     /* next     */

				if ( snip(contour,u,v,w,nv,verts)){
				  var a:int,b:int,c:int,s:int,t:int;

				  /* true names of the vertices */
				  a = verts[u]; b = verts[v]; c = verts[w];

				  /* output Triangle */
				  result.push( contour[a] );
				  result.push( contour[b] );
				  result.push( contour[c] );

				  m++;

				  /* remove v from remaining polygon */
				  for(s=v,t=v+1;t<nv;s++,t++) verts[s] = verts[t]; nv--;

				  /* resest error detection counter */
				  count = 2 * nv;
				}
			  }

			  return result;
		}

		// calculate area of the contour polygon
		public function area(contour:Array):Number{
			var n:int = contour.length;
			var a:Number  = 0.0;

			for(var p:int=n-1, q:int=0; q<n; p=q++){
				a += contour[p].x * contour[q].y - contour[q].x * contour[p].y;
			}
			return a * 0.5;
		}

		// see if p is inside triangle abc
		public function insideTriangle(ax:Number, ay:Number, bx:Number, by:Number, cx:Number, cy:Number,px:Number,py:Number):Boolean{

			  var aX:Number, aY:Number, bX:Number, bY:Number
			  var cX:Number, cY:Number, apx:Number, apy:Number;
			  var bpx:Number, bpy:Number, cpx:Number, cpy:Number;
			  var cCROSSap:Number, bCROSScp:Number, aCROSSbp:Number;

			  aX = cx - bx;  aY = cy - by;
			  bX = ax - cx;  bY = ay - cy;
			  cX = bx - ax;  cY = by - ay;
			  apx= px  -ax;  apy= py - ay;
			  bpx= px - bx;  bpy= py - by;
			  cpx= px - cx;  cpy= py - cy;

			  aCROSSbp = aX*bpy - aY*bpx;
			  cCROSSap = cX*apy - cY*apx;
			  bCROSScp = bX*cpy - bY*cpx;

			  return ((aCROSSbp >= 0.0) && (bCROSScp >= 0.0) && (cCROSSap >= 0.0));
		}

		private function snip(contour:Array, u:int, v:int, w:int, n:int, verts:Array):Boolean{
			  var p:int;
			  var ax:Number, ay:Number, bx:Number, by:Number;
			  var cx:Number, cy:Number, px:Number, py:Number;

				  ax = contour[verts[u]].x;
				  ay = contour[verts[u]].y;

				  bx = contour[verts[v]].x;
				  by = contour[verts[v]].y;

				  cx = contour[verts[w]].x;
				  cy = contour[verts[w]].y;

	      if ( EPSILON > (((bx-ax)*(cy-ay)) - ((by-ay)*(cx-ax))) ) return false;

			  for (p=0;p<n;p++){
					if( (p == u) || (p == v) || (p == w) ) continue;
					px = contour[verts[p]].x
					py = contour[verts[p]].y
					if (insideTriangle(ax,ay,bx,by,cx,cy,px,py)) return false;
			  }
			  return true;
		}
	}
}
… and the Pnt class:
// Point class, no reason to use AS3's build in Point
package{
	public class Pnt {
		public var x:Number;
		public var y:Number;
		public function Pnt(x:Number, y:Number){
			this.x = x;
			this.y = y;
		}
	}
}
// from http://www.bit-101.com/blog/?p=729
var number:Number = 10.5;

// for numbers
var isEven:Boolean = (number % 2) == 0;
trace(isEven);

// for ints
var integer:int = 10;
isEven = (integer & 1) == 0;
trace(isEven);
This is a classic that I’ve seen all over the place online… found myself needing it today and figured I should post it. It just an easy way to determine if a number is odd or even… I remember originally reading it over at Bit-101.com a few years back…
Two posts today because I think I missed a post recently…
// from http://codebase.dbp-site.com/code/find-difference-between-two-angles-25
function angleDifference(angle0:Number, angle1:Number):Number{
	return Math.abs((angle0 + 180 -  angle1) % 360 - 180);
}

trace("get the angle between:");
trace("350 and 10 =", angleDifference(350, 10));
trace("180 and -1 =", angleDifference(180, -1));
trace("-10 and 5 =", angleDifference(-10, 5));
trace("725 and -45 =", angleDifference(725, -45));
/* outputs:
get the angle between:
350 and 10 =  20
180 and -1 =  179
-10 and 5 =  15
725 and -45 =  50
*/
This snippet shows an easy way to find the difference between two angles. The tricky part about doing this is finding the difference between something like 350 and 1 (which should be 11).
Over the years I have done this a few different ways – I needed it for something today and realized that my way was a tad clunky (had a little redundant logic) – So with a quick google search I found a more elegant solution.
[SWF(width=600,height=500,frameRate=30)]
var canvas:BitmapData=new BitmapData(600,500,false,0x000000);
addChild(new Bitmap(canvas));
var size:Number=canvas.width*canvas.height;
var w:Number=canvas.width;
var wd:Number=1/w;
var pix:Vector.<uint> = new Vector.<uint>();
var sin:Number;
var cos:Number;
var dx:Number=110;
var dy:Number=52;
addEventListener(Event.ENTER_FRAME, onLoop);
function onLoop(evt:Event):void {
	dx+=0.001;
	canvas.lock();
	for (var i:int = 0; i<size; i++) {
		var xp:Number=i%w;
		var yp:Number=int(i*wd);
		var xx:Number=xp*0.05+dx;
		var yy:Number=yp*0.05+dy;
		var t:Number= (xx * yy) % 3.14159265;
		//compute sine
		// technique from http://lab.polygonal.de/2007/07/18/fast-and-accurate-sinecosine-approximation/
		// by Michael Baczynski
		if (t<0) {
			sin=1.27323954*t+.405284735*t*t;
		} else {
			sin=1.27323954*t-0.405284735*t*t;
		}
		//compute cosine: sin(t + PI/2) = cos(t)
		t+=1.57079632;
		if (t>3.14159265) {
			t-=6.28318531;
		}
		if (t<0) {
			cos=1.27323954*t+0.405284735*t*t;
		} else {
			cos=1.27323954*t-0.405284735*t*t;
		}
		var c:Number=sin+cos*cos*cos;
		// fast math abs
		c=c<0? -c:c;
		c=c*140;
		// math max 255
		c=c>255?255:c;
		pix[i]=c<<16|c<<8|c;
	}
	canvas.setVector(canvas.rect, pix);
	canvas.unlock();
}
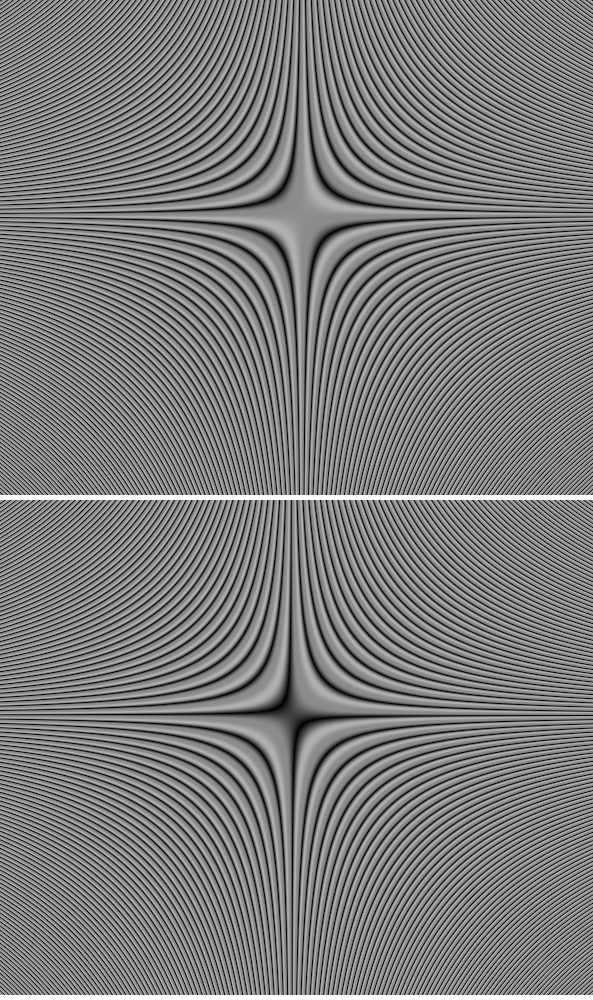
The above snippet will animate a gradient that looks like this:
var ui:QuickUI = new QuickUI();
ui.x = 20;
ui.y = 260;
ui.addEventListener(Event.CHANGE, onChange);
addChild(ui);

var spriteA:Sprite = makeSprite(150,150,0xFF0000);
spriteA.addEventListener(MouseEvent.CLICK, onShowAddProps);

var spriteB:Sprite = makeSprite(350,150, 0xCC6600);
spriteB.addEventListener(MouseEvent.CLICK, onShowExcludeProps);

var spriteC:Sprite = makeSprite(550,150, 0x550066);
spriteC.addEventListener(MouseEvent.CLICK, onShowExcludeProps);

function onChange(evt:Event):void{
	// updates the property on the current target object
	ui.updateObject(evt.target);
}
function onShowAddProps(evt:MouseEvent):void{
	ui.rows = 3;
	// onle show the following properties
	//  add(property, label)
    ui.add("name", "name:");
    ui.add("x", "x location:");
	ui.add("y", "y location:");
	ui.add("scaleX", "x scale:");
	ui.add("buttonMode", "show hand cursor");
	ui.create(evt.currentTarget);
	ui.window({title:"Select Properties: "+ evt.currentTarget.name});
}

function onShowExcludeProps(evt:MouseEvent):void {
	ui.rows = 5;
	// don't show a few select properties - if add() is not called
	// all properties will be shown
	ui.exclude("doubleClickEnabled");
	ui.exclude("useHandCursor");
    // build the UI, give two custom labels to x and y properties
	ui.create(evt.currentTarget, {x:"x loc:", y:"y loc:"});
	// optionally render a window behind the UI elements
	ui.window({title:"All Properties: " + evt.currentTarget.name});
}


function makeSprite(xp:Number, yp:Number, col:uint):Sprite{
	var s:Sprite = Sprite(addChild(new Sprite()));
	s.x = xp;
	s.y = yp;
	s.buttonMode = true;
	with (s.graphics) beginFill(col), drawRect(-40, -40, 80, 80);
	return s;
}
This snippet is my first stab at creating a library that makes certain types of UI creation very easy. It works by automatically creating input text fields and check boxes for all public properties that make sense with that type of UI. It has a long way to go, but this is a good start
Recently saw some great links making use of Global Illumination/Ambient Occlusion… these ones are from wonderfl posted by keim at Si :
This first example is based on something called AO bench. one two three
and there is something called MiniLight which has been ported to Flex.