Latest snippets

JS Sketch Experiment

[SWF(width=950, height=600)]
with (graphics) beginFill(0xefefef), drawRect(0,0,stage.stageWidth, stage.stageHeight);
var btn:Sprite = Sprite(addChild(new Sprite()));
with (btn.graphics) beginFill(0x666666), drawRect(0,0,100,20);
with(btn)  x=320, y=430, buttonMode = true;
btn.addEventListener(MouseEvent.ROLL_OVER, function():void{
  with(btn.graphics) clear(), beginFill(0x222222), drawRect(0,0,100,20);
});
btn.addEventListener(MouseEvent.ROLL_OUT, function():void{
  with(btn.graphics) clear(), beginFill(0x666666), drawRect(0,0,100,20);
});
btn.addEventListener(MouseEvent.CLICK, function():void{
    var res:*= ExternalInterface.call("function(){ plot=[]; colors=[]; " + txt.text + " return {plot:plot, colors:colors};}");
    render((res == null) ? {plot:[], colors:[]} : res);
});

var v:Shape = Shape(addChild(new Shape()));
v.x = 700;
v.y = 220;
function render(obj:Object):void{
	var plot:Array = obj.plot;
	var colors:Array = obj.colors;
	var leng:int = plot.length;
	v.graphics.clear();
	var inc:int = 0;
	v.graphics.moveTo(plot[0], plot[1]);
	for (var i:int = 2; i<leng; i+=2){
		v.graphics.lineStyle(0,colors[inc++]);
		v.graphics.lineTo(plot[i], plot[i + 1]);
	}
}


var submit:TextField = TextField(btn.addChild(new TextField()));
submit.defaultTextFormat = new TextFormat("_sans", 12);
with(submit) textColor=0xFFFFFF, width=100, autoSize="center";
with(submit) mouseEnabled = false,  text="submit";

var txt:TextField = TextField(addChild(new TextField()));
with(txt) x = y = 20, type = "input", multiline=true;
with(txt) width = 400, height = 400, border = true, background = 0xFFFFFF;
txt.defaultTextFormat = new TextFormat("Monaco", 12);
txt.text = "enter text"; 
txt.addEventListener(MouseEvent.MOUSE_DOWN, onDown);
function onDown(evt:MouseEvent):void{
	txt.text = "";
	txt.removeEventListener(MouseEvent.MOUSE_DOWN, onDown);
}

This snippet is a mini code editor that allows the user to write javascript into a textfield – the javascript is then run using external interface. Optionally the javascript code can populate two arrays (plot and colors). If these arrays are populated flash, will render the data in each array using the Graphics class.

Have a look at the demo:
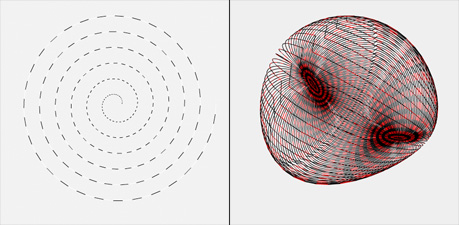
If you do something nice with this… post your javascript snippet as a comment and I’ll add it to the JS Sketch page…

ActionScript Eval (well, not really)

var txt:TextField = TextField(addChild(new TextField()));
txt.autoSize = TextFieldAutoSize.LEFT;

var myVar:Number = 100;
// works as an expression parser
txt.text = js("return (" + myVar + " * 2 + 10) / 2");
txt.appendText("nn");

// parses javascript
txt.appendText(js("var a = []; for (var i = 0; i<10; i++){ a.push(i) } return a;"));

function js( data:String ):*{
   var res:*= ExternalInterface.call("function(){" + data + "}");
   return (res == null) ? "null" : res;
}

This one made my day – CAN’T believe I never thought of it before… haven’t done any speed tests yet… but it shows how to use ExternalInterface.call to parse math expressions and javascript code. This will only work when the swf is shown in an html page of course… so if your in flash cmd+f12…

I got the idea from this code snippet… which actually has an error in it… the decode() function should not return void… I found that snippet thanks to this tweet by makc3d.

E8 Inspired Forms

This doesn’t have much to do with E8.. but it is vaguely inspired by it…

View the demo… (source code is below)

var hw:Number = stage.stageWidth / 2;
var hh:Number = stage.stageHeight / 2;

var canvas:BitmapData = new BitmapData(stage.stageWidth,stage.stageHeight, false, 0x333333);
addChild(new Bitmap(canvas));
var vector:Shape = Shape(addChild(new Shape()));

// contrast
var cm:ColorMatrixFilter = new ColorMatrixFilter([2.6,0,0,0,-101.6,0,2.6,0,0,-101.6,0,0,2.6,0,-101.6,0,0,0,1,0]);
filters = [cm];

var over:BitmapData = new BitmapData(stage.stageWidth,stage.stageHeight, false, 0x333333);
var frm:Bitmap = Bitmap(addChild(new Bitmap(over)));

frm.blendMode = BlendMode.OVERLAY;
 
var dotNum:int = 250;
var dotConnected:int = 0;
var curr:int = 0;
var prevConnected:int = -1;
var dots:Vector.<Point> = new Vector.<Point>(dotNum, true);

// consider altering this value manually
var step:Number =  Math.random()*10

var theta:Number = -.5234;
for (var i:int= 0; i < dotNum; i++){
	var r:Number = 280
	theta += step;
	var xp:Number = hw + r  * Math.cos(theta);
	var yp:Number = hh + r * Math.sin(theta);
	dots[i] = new Point(xp, yp);
}

var col:uint = 0xFFFFFF;
var a:Point, b:Point;
var connections:int = 0;

var txt:TextField = TextField(addChild(new TextField()));
txt.defaultTextFormat = new TextFormat("_sans", 12);
txt.textColor = 0x555555, txt.x = 10, txt.y = 10;
txt.autoSize = "left";
txt.text = step.toString();

addEventListener(Event.ENTER_FRAME, onLoop);
function onLoop(evt:Event):void{
	 
	over.applyFilter(canvas, over.rect, new Point(0,0), new BlurFilter(10,10, 1));
	
	for (var i:int = 0; i<100; i++){
		if (dotConnected < dotNum - 1){
			if (prevConnected != dotConnected){
				a = dots[dotConnected];
			}
			prevConnected = dotConnected;
			b = dots[curr];
			curr++;
			
			if (a != b){
				connections++;
				vector.graphics.clear();
				vector.graphics.lineStyle(0,col,0.05);
				vector.graphics.moveTo(a.x, a.y);
				vector.graphics.lineTo(b.x, b.y);
				canvas.draw(vector); 
			}
			if (curr > dotNum - 1){
				curr = 0;
				dotConnected++;
				col =[0,0xFFFFFF][int(Math.random()*2)];
			} 
		}else{
			break;
			trace("done");
			removeEventListener(Event.ENTER_FRAME, onLoop);
		}
	}
}

QuickBox2D Mini-Machine

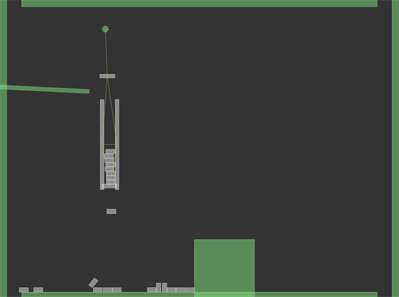
Since this is a rather large snippet check out this demo first:

View Demo…

and here is the source:

import com.actionsnippet.qbox.*
import Box2D.Collision.Shapes.*;
import Box2D.Common.Math.*;

[SWF(width = 800, height = 600, backgroundColor = 0x000000, frameRate = 60)]

var sim:QuickBox2D = new QuickBox2D(this, {debug:true});
 
var sw:Number = stage.stageWidth / 30;
var sh:Number = stage.stageHeight / 30;
			
sim.addBox({x:sw / 2, y:sh, width:sw - 3, height:1,  density:.0})
sim.addBox({x:sw / 2, y:0, width:sw - 3, height:1,  density:.0 })
sim.addBox({x:0, y:sh / 2, width:1, height:sh ,  density:.0})  
sim.addBox({x:sw, y:sh / 2, width:1, height:sh,  density:.0})  

var slider:QuickObject = sim.addBox({x:3, y:6, width:6, height:0.25, density:0, angle:0.05});
var pusher:QuickObject = sim.addBox({x:15, y:18, width:4, height:4, density:0});

sim.setDefault({collideConnected:false, frequencyHz:10});
var anchor:QuickObject = sim.addCircle({x:3, y:2, radius:0.2, density:0});

var m0:QuickObject = sim.addBox({x:3, y:5, width:1, height:0.25, fixedRotation:true});

var j0:QuickObject = sim.addJoint({type:"distance", a:anchor.body, b:m0.body});

var m1:QuickObject = sim.addBox({x:2.5, y:9.5, width:0.25, height:6, fixedRotation:true});
var m2:QuickObject = sim.addBox({x:3.5, y:9.5, width:0.25, height:6, fixedRotation:true});

var j1:QuickObject = sim.addJoint({type:"distance", a:m0.body, b:m1.body});
var j2:QuickObject = sim.addJoint({type:"distance", a:m0.body, b:m2.body});
var j3:QuickObject = sim.addJoint({type:"distance", a:m2.body, b:m1.body});

var boxes:Array = [];
var boxNum:int = 21;
var index:int = boxNum;
var filter:b2FilterData;
var lookupQuickObject:Dictionary = new Dictionary();
for (var i:int = 0; i<boxNum; i++){
	boxes[i] = sim.addBox({x:3, y:6.3 + i * 0.3, width:0.6, height:0.3,  friction:0.0, allowSleep:false});
	lookupQuickObject[boxes[i].shape] = boxes[i];
}

var m3:QuickObject = sim.addBox({x:3, y:12.25 , width:1, height:0.25, allowSleep:false,fixedRotation:true, groupIndex:-1});

var j4:QuickObject = sim.addJoint({type:"revolute", a:m1.body, b:m3.body});
var j5:QuickObject = sim.addJoint({type:"revolute", a:m2.body, b:m3.body});

var t:Number = Math.PI;
var dropBox:int = 0;
var prevBox:QuickObject;
var resetVec:b2Vec2 = new b2Vec2(0,0);

function setGroupIndex(b:QuickObject, index:int):void{
	filter = b.shape.GetFilterData();
	filter.groupIndex = index;
	b.shape.SetFilterData(filter);
}

sim.start();
sim.addEventListener(QuickBox2D.STEP, onStep);
function onStep(evt:Event):void{
	dropBox++;
	
	if (dropBox % 80 == 0){
		index--;
		if (index > -1){
			if (prevBox){
				setGroupIndex(prevBox, 1);
			}
			prevBox = boxes[index]
			setGroupIndex(boxes[index], -1);
			m3.y += 0.05;
		}
	}
	
	if (index < 0){
		if (pusher.x > 3.5){
			pusher.x -= 0.05;
		}
	}
	for (var i:int = 0; i<boxNum; i++){
		if (boxes[i].y > 22){
			boxes[i].angle = 0;
			boxes[i].y = -2;
			boxes[i].x = 1;
			boxes[i].body.SetLinearVelocity(resetVec);
		}
	}
	
	if (index > 0){
	  anchor.x = 6 + 3 * Math.cos(t);
	  t += 0.01;
	}
}

QuickFRIM

import com.actionsnippet.animation.*;

stage.frameRate = 60.0;

// args: main display object, Hz
var frim:QuickFRIM = new QuickFRIM(this, 60.0);

// start QuickFRIM internal loop
frim.start();

// listen for step and render
frim.addEventListener(QuickFRIM.STEP, onStep);
frim.addEventListener(QuickFRIM.RENDER, onRender);

// happes from 0 or more times per frame depending on your framerate and desired Hz
function onStep(evt:Event):void {
	 //
}

// happens once per frame after all STEP events have
// been dispatched
function onRender(evt:Event):void{
	 // number of times a step even was dispatched this frame
	 trace(frim.stepsPerFrame);
}

I have been using this QuickFRIM class for the past few days and have been pretty happy with it. Being someone who still occasionally likes to roll their own AS animation… with Zeno’s, Hooke’s, Polar Coordinates etc… Having a simple solution for frame-rate independent motion is nice… especially for small games… I used to have a more complex technique for this that was significantly harder to maintain. The above is just the basic setup for using the class.

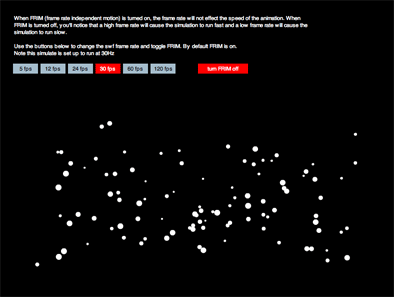
The most important part of the class is the Hz (Hertz) argument in the QuickFRIM constructor. This should be set to how many times you want your step event to be dispatched per second. Usually this would simply be set to your target fps… so if your swf fps is 30, you should probably pass 30 to the QuickFRIM constructor. If you were to have an fps of 30 and pass 60Hz to your constructor… the step event would consistently dispatch 2 times per frame. If you had an Hz of 10 and an fps of 30, your step even would only get triggered every three frames etc…

Here’s a demo…

I should note that I spent some time looking at different FRIM implementations online and in the end I found this thread https://developer.playfirst.com/node/860 which my implementation is significantly based upon.

Here’s the code for the class
Here you can download a zip of the class

… and here is some very quick documentation
QuickFRIM:

/*
@param main – the main timeline or other DisplayObject
@param hz – Hertz for he timeStep
*/
new QuickFRIM(main:DisplayObject, hz:Number = 60.0)

// dispatched every time a step even occurs
QuickFRIM.STEP

// dispatched after all step events have occurred at the end of the frame
QuickFRIM.RENDER

// start dispatching events
public function start();

// stop dispatching events
public function stop();

// 1.0 / Hertz
public var timeStep:Number;

// total number of time steps that have been dispatched
public var totalTimeSteps:Number=0;

// numer of step events dispatched this frame
public var stepsPerFrame:int=0;

// boolean to disable FRIM
public var disable:Boolean = false;

Great ActionScript Site

I keep meaning to post a link to this site… really great articles over there…. I highly recommend reading through them…

http://jacksondunstan.com/

After reading Everything’s a Function. I remembered another strange thing that I noticed about the ActionScript compiler and auto-formatting.

Auto-formatting in flash is totally broken and can completely ruin your code – so never use it. It’s officially unusable as far as I’m concerned. I can dig up some code later and add it here… most people reading this probably know exactly what I’m talking about…

Anyway… one thing I’ve seen auto-formatting do is to remove the () after a class instantiation…

From this:

var s:Sprite = new Sprite();

to this:

var s:Sprite = new Sprite;

… and you would think the second one would break, but it doesn’t – it works just fine…. very odd… to see it in action try this:

var s:Sprite = new Sprite;
with(s.graphics) beginFill(0xFF0000), drawCircle(0,0,500);
addChild(s);

Can anyone shed light on that?

Processing Class at FMA

This Sunday I’m doing a free one day workshop in Processing.

Processing is a gateway programming language. It helped me to ease my way into Java, C++ and OpenGL. Without Processing, learning those languages would have been much harder for me. Processing is also an amazing tool for prototyping and doing proof of concept tests.

The class itself is eleven weeks long but the first class is free. If you’d like to read more about it, or sign up for the whole eleven weeks check out this link:

Processing Class at FMA

If you want to attend the free workshop, simply post a comment and you’ll be e-mailed a free pass for the class.

And if you haven’t seen Processing.js yet… check it out here.

Timebased Animation Idea (FRIM & QuickBox2D)

import com.actionsnippet.qbox.*;

// change the frame rate and test...
stage.frameRate = 60;

[SWF(width = 800, height=600)]

var sim:QuickBox2D = new QuickBox2D(this);


var circle:Shape = Shape(addChild(new Shape()));
with(circle.graphics) beginFill(0), drawCircle(0,0,50);
circle.x = 100, circle.y = 100;


sim.start();

var startTime:Number;
// delay the start a bit
setTimeout(function():void {
  startTime = getTimer();
  sim.addEventListener(QuickBox2D.STEP, onTimeStep);
}, 500);

function onTimeStep(evt:Event):void{
	
	circle.x += (600 - circle.x) / 12;
	
	if ((600 - circle.x) < 1.5){
		trace("frameRate: ", stage.frameRate);
		trace("totalTime: ", getTimer() - startTime +" ms");
		trace("totalTimeSteps: ", sim.totalTimeSteps);
		sim.removeEventListener(QuickBox2D.STEP, onTimeStep);
	}
}

Note: This snippet requires QuickBox2D 1.0 or greater

Really not sure how I didn’t think of doing this before last night… I realized that the simple FRIM code inside of QuickBox2D can be used to make any standard frame-based style ActionScript animation time-based. In this snippet I do a simple ease out one liner:

circle.x += (600 – circle.x) / 12;

Code like that on an enterFrame would run at different speeds depending on your framerate. However, if you run it on QuickBox2D’s STEP event it runs independent of fram-erate. I’m obviously going to just wrap this up into it’s own mini-library separate from QuickBox2D and do a more in depth post about it… but for now, this snippet just traces out the results. These are my results from my macbook pro dual 2.4 intel….

frameRate: 12
totalTime: 1165 ms
totalTimeSteps: 93

frameRate: 24
totalTime: 1162 ms
totalTimeSteps: 93

frameRate: 30
totalTime: 1166 ms
totalTimeSteps: 91

frameRate: 60
totalTime: 1167 ms
totalTimeSteps: 93

frameRate: 120
totalTime: 1168 ms
totalTimeSteps: 91

Anyway… will peel the FRIM code out of QuickBox2D and wrap it up in its own library sometime soon…

QuickBox2D Joint Skinning

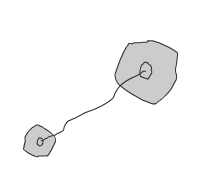
Well… while on the topic of skinning I figured I’d post something I’ve been meaning to post for awhile. Currently, joint skinning leaves something to be desired in QuickBox2D. This is because I haven’t had the need to skin many joints … and also because with joints like pulley, prismatic, revolute etc… I’m not entirely sure what the best skinning solution even is… For instance, on a pulley you probably don’t want three duplicate MovieClips used for the skin. Anyway, early on in my Box2D experimentation I needed distance joint skins so that feature has been around since maybe alpha 108…

It’s pretty simple, Check out the demo and code below:

import com.actionsnippet.qbox.*;
 
[SWF(width = 800, height = 600, backgroundColor = 0xFFFFFF, frameRate=60)]

var sim:QuickBox2D = new QuickBox2D(this, {debug:false});

sim.createStageWalls({fillColor:0xFFFFFF});
 
var circleA:QuickObject = sim.addCircle({x:3, y:3, radius:1, skin:CircleSkin});
var circleB:QuickObject = sim.addCircle({x:6, y:6, radius:0.5, skin:CircleSkin});

sim.addJoint({type:"distance", a:circleA.body, b:circleB.body, skin:JointSkin});

sim.start();
sim.mouseDrag();


Check out the swf here…

Download the fla here…

QuickBox2D Skinning Examples

I’ve been trying to finalize the way QuickBox2D skinning works… so that its flexible and so that I only add to the api rather than modifying it. So this post really has two main purposes… the first is to show you lots of skinning examples from complex to simple – and the second is to get feedback… I want suggestions regarding this – one of the reasons that Box2D allows you to manage skinning however you want is because there is no real general purpose solution for all cases. I designed QuickBox2D’s skinning based on my needs, but I’d like to refine it… and make it more flexible… so post your comments and complaints 😉

Bug Note

There was a bug in QuickBox2D 1.0 with skinning… I’ve updated the zip… so that this doesn’t break anyone’s projects… but I’ll also be zipping up QuickBox2D 1.1 and posting it late tonight… However in order to tweak these examples you’ll need to download this the new 1.0 zip.

Complex Skinning

Here is a demo showing the kind of stuff I use QuickBox2D for… I use lots of polygon rigid bodies so the skins are never scaled or anything… (I used my unreleased editor to generate the polygon data)


Check out the swf…

Download the fla

Library Skinning

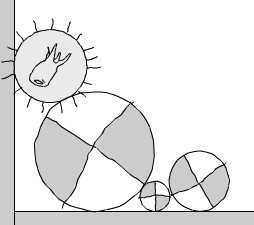
By default QuickBox2D will resize your skins to match your rigid bodies. There are times when this doesn’t make sense so I’ve added a new property to disable this. This demo shows circles that are automatically resized and one circle that has automatic skin resizing turned off (scaleSkin = false).


Here is the swf….


Below is the source… Here is the fla

import com.actionsnippet.qbox.*;
stage.frameRate = 60;
var sim:QuickBox2D = new QuickBox2D(this, {debug:false});

sim.createStageWalls();

// QuickBox2D by default scales library skins
sim.addCircle({x:3, y:3, radius:2, skin:Xcircle});
sim.addCircle({x:6, y:3, radius:0.5, skin:Xcircle});
sim.addCircle({x:18, y:3, radius:1, skin:Xcircle});

// sometimes you may not want this behavior
// here the rays of the ToothSun skin are not part of the 
// rigid body...
sim.setDefault({scaleSkin:false});
sim.addCircle({x:12, y:3, radius:73 / 60, skin:ToothSun});

sim.start();
sim.mouseDrag();

DisplayObject Skinning

This feature was requested by a few users. Basically it allows you to lay your DisplayObjects out on the stage… QuickBox2D reads their width, height, x, y and rotation values and adjusts the rigid body accordingly. If you specify width, height or radius in the params object then QuickBox2D will use that value – however currently setting x, y or angle in the params object will simply be ignored… as your basically defeating the purpose of using a DisplayObject skin. You can however set x, y and angle immediately after using one of the QuickBox2D creation methods… but really you should just use a library skin if you intend to set all the properties in ActionScript.


Have a look at the swf…

This source is a bit long so you can download the fla here…

Looking for Feedback

I think those few fla files cover most of the different ways you can do skinning in QuickBox2D. I may elaborate a bit in a future post or in the comments… I’d really appreciate any suggestions people have regarding this, so please post comments if you dislike something or find any bugs…