Latest snippets

Animate Along Bezier Curve

var circle:Shape = Shape(addChild(new Shape));
with(circle.graphics) beginFill(0x000000), drawCircle(0,0,5);
 
var bezierPoint:Point = new Point();
function bezier(a:Number, x1:Number, y1:Number, x2:Number, y2:Number, x3:Number, y3:Number):void {
		var b:Number =1-a;
		var pre1:Number=a*a;
		var pre2:Number=2*a*b;
		var pre3:Number=b*b;
		bezierPoint.x = pre1*x1 + pre2*x2  + pre3*x3;
	    bezierPoint.y = pre1*y1 + pre2*y2 + pre3*y3;
}

var inc:Number = 0;
var theta:Number = 0;

addEventListener(Event.ENTER_FRAME, onLoop);
function onLoop(evt:Event):void {
	
	 graphics.clear();
	 graphics.lineStyle(0,0xFF0000);
     graphics.moveTo(200,200);
     graphics.curveTo(mouseX, mouseY, 400, 200);

	theta+= .05;
	inc = .5 + .5*Math.sin(theta);
 
	bezier(inc, 200, 200, mouseX, mouseY, 400, 200);
	circle.x = bezierPoint.x;
	circle.y = bezierPoint.y;
}

The above animates a circle along a quadratic bezier curve. This snippet was written in response to a question spurned by some of the recent bezier posts. I used Math.sin() to animate the circle but you could just as easily use modulus… simply replace lines 25-26 with the following:

inc += .03;
inc %= 1;

Seamless Tiles

[SWF(width=600, height=500, backgroundColor=0xFFFFFF, frameRate=30)]

function seamlessTile(img:BitmapData, featherSize:Number = 5):BitmapData{
	var pnt:Point = new Point(0,0);
	var tile:BitmapData = new BitmapData(img.width, img.height, true, 0xFF000000);
	tile.copyPixels(img, img.rect, pnt, null, null, true);
	
	var flipped:BitmapData = new BitmapData(img.width, img.height, true, 0xFF000000);
	var m:Matrix = new Matrix();
	m.scale(-1, 1);
	m.translate(tile.width,0);
	flipped.draw(tile, m);
	
	var aChannel:BitmapData = new BitmapData(img.width, img.height, true, 0x00000000);
	var grad:Sprite = new Sprite();
	m.createGradientBox(img.width, img.height, 0, 0, 0);
	
	grad.graphics.beginGradientFill(GradientType.LINEAR, [0xFFFFFF, 0xFFFFFF],  [1, 0], [0, (255 / img.width) * img.width / featherSize], m, SpreadMethod.PAD);
	
	grad.graphics.drawRect(0,0,img.width, img.height);
	aChannel.draw(grad);
 
	tile.copyPixels(flipped, flipped.rect, pnt, aChannel, pnt, true);
	
	m.identity();
	m.scale(1, -1);
	m.translate(0,tile.height);
	flipped.draw(tile, m)
	
	aChannel.fillRect(aChannel.rect, 0x00000000);
	m.createGradientBox(img.width, img.height, Math.PI / 2, 0, 0);
	grad.graphics.clear();
	grad.graphics.beginGradientFill(GradientType.LINEAR, [0xFFFFFF, 0xFFFFFF], [1, 0], [0, (255 / img.height) * img.height / featherSize],  m, SpreadMethod.PAD);
	
	grad.graphics.drawRect(0,0,img.width, img.height);
	aChannel.draw(grad, grad.transform.matrix);
	
	tile.copyPixels(flipped, flipped.rect, pnt, aChannel, pnt, true);
	return tile;
}

// test out the function:
var canvas:BitmapData = new BitmapData(600, 470, true, 0xFF000000);
addChild(new Bitmap(canvas));

var image:Loader = new Loader();
image.load(new URLRequest("https://actionsnippet.com/imgs/paper.jpg"));
image.contentLoaderInfo.addEventListener(Event.COMPLETE, onLoaded);
var texture:BitmapData;

function onLoaded(evt:Event):void {
	texture =  Bitmap(image.content).bitmapData;
	addEventListener(Event.ENTER_FRAME, onLoop);
	image.removeEventListener(Event.COMPLETE, onLoaded);
}

function onLoop(evt:Event):void{
	var tile:BitmapData = seamlessTile(texture, Math.max(1,mouseX/30));
	var p:Point = new Point();
	for (var i:int = 0; i<8; i++){
		p.x = (i % 4) * tile.width;
		p.y = int(i / 4) * tile.height;
		canvas.copyPixels(tile, tile.rect, p);
	}
}

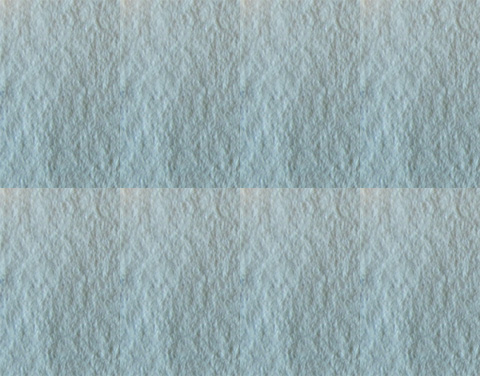
The above demos a function called seamlessTile() which takes a BitmapData object and uses an oldschool seamless tile technique on it.

The result is that you can have an image that would normally tile like this:


end up looking like this:


You can take a look at the swf here.

I learned how seamless tiles worked by observing the KPT seamless welder filter while I was in highschool. I wish I could dig up all that old KPT stuff again….

There are better seamless tile algorithms out there…. this one is very primitive, but it will work nicely if used properly. Could work well with a composite texture in Papervision 3D for instance…

Glitch Auto-asteroids

[SWF(width=600, height=400, backgroundColor=0x000000, frameRate=30)]
// make some ships
for (var i:int = 0; i<10; i++) makeShip();
//
function makeShip():void {
	// setup vars
	var char:Object ={posX:Math.random()*stage.stageWidth, posY:Math.random()*stage.stageHeight, velX:0, velY:0, rad:4, theta:Math.random()*6.28, thetaDest:Math.random()*6.28, mc: MovieClip(addChild(new MovieClip()))}
	// draw and position the char
	with(char.mc) graphics.lineStyle(0,0xFFFFFF), graphics.moveTo(-15, -5), graphics.lineTo(0, 0), graphics.lineTo(-15, 5), x=char.posX, y=char.posY;
    // loop
    addEventListener(Event.ENTER_FRAME, function(){
		// change position based on velocity, .9 friction
		with (char) posX += velX *= .9, posY += velY *= .9;
		// randomize radius and theta
		if (int(Math.random()*10) == 1) char.thetaDest += Math.random()*2-1;
		if (int(Math.random()*90) == 1) char.rad = Math.random()*4 + 4
		// apply changes to velocity
		char.theta += (char.thetaDest - char.theta) / 12;
		char.velX = char.rad * Math.cos(char.theta);
		char.velY = char.rad * Math.sin(char.theta);
		// screen bounds
		if (char.posX > 620) char.posX = -20;
		if (char.posX < -20) char.posX = 620;
		if (char.posY > 420) char.posY = -20;
		if (char.posY < -20) char.posY = 420;
		// rotation
		char.mc.rotation = (Math.abs(char.mc.y - char.posY)>.7 || Math.abs(char.mc.x - char.posX) > .7) ?  Math.atan2(char.posY - char.mc.y,char.posX -  char.mc.x) / Math.PI * 180 : char.mc.rotation;
		// shoot
		if(int(Math.random()*100) < 20) shootBullet(char, 5 * Math.cos(char.mc.rotation * Math.PI / 180)+ char.velX, 5 * Math.sin(char.mc.rotation * Math.PI / 180) + char.velY);
		// apply position
		with(char) mc.x = posX, mc.y = posY;
		});
}
// 
function shootBullet(char:Object, vx:Number, vy:Number):void{ 
    var b:MovieClip = MovieClip(addChild(new MovieClip()));
	b.life = 0;
	with(b) graphics.beginFill(0xFFFFFF), graphics.drawCircle(0,0,2), x = char.mc.x, y = char.mc.y;
	b.addEventListener(Event.ENTER_FRAME, function(){
			with (b) x += vx, y += vy, life++;
			if (b.life > 30) b.removeEventListener(Event.ENTER_FRAME, arguments.callee), removeChild(b);
	});
}

An asteroids inspired code snippet. See the swf here.

Zeno’s [classic easeOut]

stage.frameRate = 30;
var circle:Shape = Shape(addChild(new Shape()));
with(circle.graphics) beginFill(0x000000), drawCircle(0,0,10);
circle.y = 50;

addEventListener(Event.ENTER_FRAME, onLoop);
function onLoop(evt:Event):void {
	circle.x += (mouseX - circle.x) / 12;
}

Point.polar() Stars

[SWF(width=700, height=400, backgroundColor=0x000000, frameRate=30)]

var points:Array = new Array();
var index:int = -1;
function polar(thetaInc:Number, radius:Number):Point{
	index++;
	if (!points[index]) points[index] = 0;
	return Point.polar(radius, points[index] += thetaInc)
}
///////////////////////////////////////////////////
// test it out:
 
var canvas:BitmapData = new BitmapData(700, 400, false, 0xFFFFFF);
 
addChild(new Bitmap(canvas, "auto", true));

var p0:Point = new Point(200, 200);
var p1:Point = new Point(500, 200);

addEventListener(Event.ENTER_FRAME, onLoop);
function onLoop(evt:Event):void {
	
	var rad:Point = polar(.05, 4);
	 
	for (var i:int= 0; i<100; i++){
		
		// reset index;
		index = -1;
	   
	    p0 = p0.add(polar(.025, 2).add(polar(-.05,rad.x)));
	    canvas.setPixel(p0.x, p0.y, 0x000000);
		
		p1 = p1.add(polar(.025, 2).add(polar(-.05,rad.x).add(polar(.1, rad.y))));
	    canvas.setPixel(p1.x, p1.y, 0x000000);
	}
}

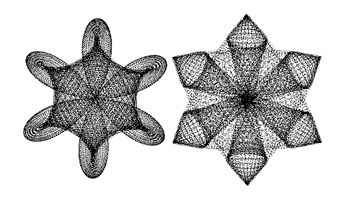
This is pretty much the same as yesterdays… I just changed the way I use the polar() function to draw two more shapes:

Playing with Curves Point.polar()

[SWF(width=600, height=500, backgroundColor=0x000000, frameRate=30)]
var points:Array = new Array();
var index:int = -1;
function polar(thetaInc:Number, radius:Number):Point{
	index++;
	if (!points[index]) points[index] = 0;
	return Point.polar(radius, points[index] += thetaInc);
}
///////////////////////////////////////////////////
// test it out:
 
var canvas:BitmapData = new BitmapData(600, 500, false, 0xFFFFFF);
 
addChild(new Bitmap(canvas, "auto", true));

var p0:Point = new Point(80, 100);
var p1:Point = new Point(270, 100);
var p2:Point = new Point(480, 40);
var p3:Point = new Point(170, 180);
var p4:Point = new Point(430, 300);

addEventListener(Event.ENTER_FRAME, onLoop);
function onLoop(evt:Event):void {
	for (var i:int= 0; i<100; i++){
		
		// reset index;
		index = -1;
		
        p0 = p0.add(polar(.2, 4).add(polar(-.4,2).add(polar(.05, 1))));
	    canvas.setPixel(p0.x, p0.y, 0x000000);
	
	    p1 = p1.add(polar(.1, 2).add(polar(-.2, 2).add(polar(.03, 1).add(polar(-.01,.5)))));
	    canvas.setPixel(p1.x, p1.y, 0x000000);
	  
	    p2 = p2.add(polar(.08, 3 ).add(polar(-.2, -12).add(polar(2, 10))));
	    canvas.setPixel(p2.x, p2.y, 0x000000);
	  
	    p3 = p3.add(polar(.08, 7).add(polar(-.2, -12).add(polar(2, 11))));
	    canvas.setPixel(p3.x, p3.y, 0x000000);
	   
	    p4 = p4.add(polar(.025, 2).add(polar(-.05,1)));
	    canvas.setPixel(p4.x, p4.y, 0x000000);
	}
}

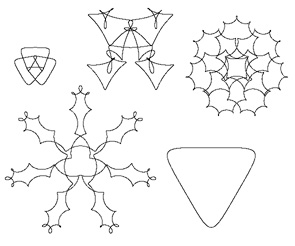
The polar() function is the real trick here… the rest of the code just uses it to draw this:

The Point.polar() function is just a conversion from polar to cartesian coords:

x = radius * Math.cos(theta);
y = radius * Math.sin(theta);

Game of Life Snippets

SNIPPET ONE

SNIPPET TWO

I was very impressed when I saw Mario Klingemann’s game of line in 3 lines of code blog post late last year. I’ve been meaning to post about it for awhile – finally got around to it.

Mario Klingemann is the developer of Peacock… an excellent node based image generator written in ActionScript.

BitmapData.paletteMap() is very powerful. I haven’t done much with it, but I have some ideas floating around.

For those of you that are game of live savvy… try other rule sets from the lexicon… my personal favorite has always been coral (45678/3). Here’s a link to some more.

Another short game of life recently appeared on on the 25lines.com forums…. here… the forum post features a nice explanation for using a ConvolutionFilter and Threshold to create The Game of Life. The technique is so small and impressive looking that I figured I’d post it as is right here:

addChild(new Bitmap(new BitmapData(stage.stageWidth, stage.stageHeight, false, 0)))["bitmapData"].noise(int(Math.random()*int.MAX_VALUE),0,255,7,true);
addEventListener(Event.ENTER_FRAME, function (e) {
   getChildAt(0)["bitmapData"].applyFilter(getChildAt(0)["bitmapData"], getChildAt(0)["bitmapData"].rect, new Point(), new ConvolutionFilter(3, 3, [3,3,3,3,2,3,3,3,3],255,0,true,false,0,1));
   getChildAt(0)["bitmapData"].threshold(getChildAt(0)["bitmapData"], getChildAt(0)["bitmapData"].rect, new Point(), "==", 8, 0xFFFFFFFF, 0xFC);
   getChildAt(0)["bitmapData"].threshold(getChildAt(0)["bitmapData"], getChildAt(0)["bitmapData"].rect, new Point(), "!=", 0xFFFFFFFF, 0x00000000)})

The above code is by Daniil Tutubalin 25lines.com forums.

UPDATE:

Since writing this post the 25lines.com forum thread has grown to include a 4 line version and some additional discussion about this topic… be sure to check it out.

Parallax Displacement Map w/BlendMode

var blends:Array = [BlendMode.ADD, BlendMode.DARKEN, BlendMode.DIFFERENCE, BlendMode.HARDLIGHT, BlendMode.INVERT, BlendMode.LIGHTEN, BlendMode.MULTIPLY, BlendMode.OVERLAY, BlendMode.SCREEN, BlendMode.SUBTRACT];

and a little later…

displace.perlinNoise(150,150, 3, 30, true, false,0,true);
var currentBlend:String = blends[ blendCount % blends.length];
displace.draw(radial, null ,null, currentBlend);
blendCount++;

The above are excepts from a recommendation I made in the comments of yesterdays post…


Try some different blend modes…. take a look at the swf here.

Parallax Displacement Map

[SWF(width=500, height=500, backgroundColor=0xCCCCCC, frameRate=30)]

var canvas:BitmapData = new BitmapData(500, 500, true, 0xFF000000);
addChild(new Bitmap(canvas));

// create a radial gradient
var radial:Shape = new Shape();
var m:Matrix = new Matrix()
m.createGradientBox(500,500,0,0,0);
radial.graphics.beginGradientFill(GradientType.RADIAL, [0xFFFFFF, 0x000000], [1, 1], [0, 200], m, SpreadMethod.PAD);

radial.graphics.drawRect(0,0,500,500);
radial.x = radial.y = 0;

var displace:BitmapData = new BitmapData(500, 500, false,0xFF000000);
displace.perlinNoise(150,150, 3, 30, true, false,0,true);

// try different blendmodes here
displace.draw(radial, null ,null, BlendMode.LIGHTEN);
 
var displacementMap:DisplacementMapFilter = new DisplacementMapFilter(displace, new Point(0,0), 1, 1,  0, 0, DisplacementMapFilterMode.WRAP);

var scale:Number = 50 / stage.stageWidth;

addEventListener(Event.ENTER_FRAME, onLoop);
function onLoop(evt:Event):void {
 
	canvas.copyPixels(displace, canvas.rect, new Point(0,0));
	 
	displacementMap.scaleX = 25 - mouseX  * scale ;
	displacementMap.scaleY = 25 - mouseY  * scale ;
	
	canvas.applyFilter(canvas, canvas.rect, new Point(0,0), displacementMap);
}

This one is hard to describe, so take a look at the swf first .

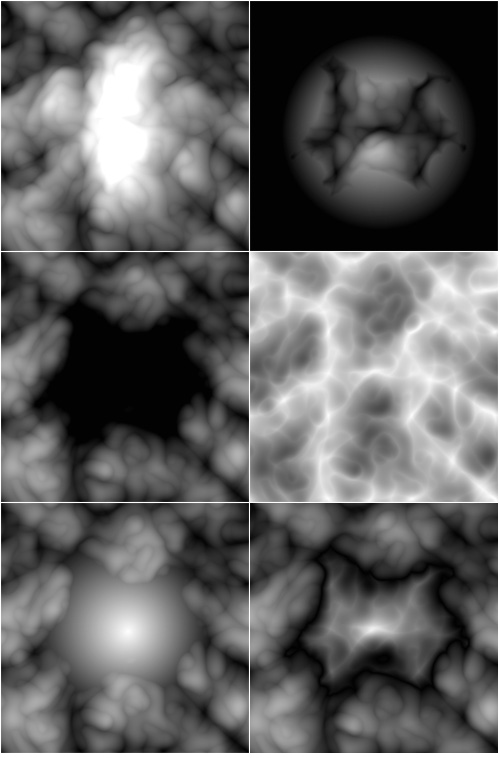
I think displacement maps are underused – they’re very powerful. In this snippet I use a DisplacementMapFilter to create a parallax effect on some perlin noise and a radial gradient. The result is an abstract texture that looks 3D.

I got the idea from a demo for the alternative game engine. The first time I saw this demo I had no idea how they were doing it… but after looking at it a few times, I noticed some distortion around the neck area of the model… at that point I recognized it as a displacement map and whipped up a demo (using a drawings as the source image). The alternativa demo also has some color stuff happening to simulate lighting… I’m assuming that’s done with a ColorMatrixFilter or two, but I’m not sure.

As in the alternativa demo, this technique could be used with 2 images… one depth map rendered out from your favorite 3D app and one textured render….
Matrix() 3 Point Skew

[SWF(width=500, height=500, backgroundColor=0xFFFFFF, frameRate=30)]

var box:Sprite = createSprite("Rect", 0, 0, 100, 100, 0xFF0000);

var d0:Sprite = drag(createSprite("Ellipse",  -5, -5, 10, 10));
d0.x = d0.y = 200;

var d1:Sprite = drag(createSprite("Ellipse",  -5, -5, 10, 10));
d1.x = 200
d1.y = 300;

var d2:Sprite = drag(createSprite("Ellipse",  -5, -5, 10, 10));
d2.y = d0.y;
d2.x = 300;

addEventListener(Event.ENTER_FRAME, onLoop);

function onLoop(evt:Event):void {
 
	var m:Matrix = new Matrix();
	m.scale((d2.x - d0.x) / 100,(d1.y - d0.y) / 100);
	m.translate(d0.x, d0.y);
	
	m.c =  (d1.x - d0.x) / 100
	m.b =  (d2.y - d0.y ) / 100
	
	box.transform.matrix = m;
}

function createSprite(shape:String, xp:Number, yp:Number, w:Number, h:Number, col:uint=0x444444):Sprite {
	var s:Sprite = new Sprite();
	s.graphics.beginFill(col);
	s.graphics["draw" + shape](xp, yp, w, h);
	addChild(s);
	return s;
}

function drag(target:*):*{
	target.addEventListener(MouseEvent.MOUSE_DOWN, function(evt:MouseEvent){ evt.currentTarget.startDrag(); });
	return target;
}

stage.addEventListener(MouseEvent.MOUSE_UP, function(){ stopDrag() });

The above creates a red rectangle that can be skewed by dragging 3 points. Why is this so cool you ask?

This is why (move your mouse)

The above was written in flash 7, before the Matrix object existed. So in order to create it I used this technique from Eric Lin.