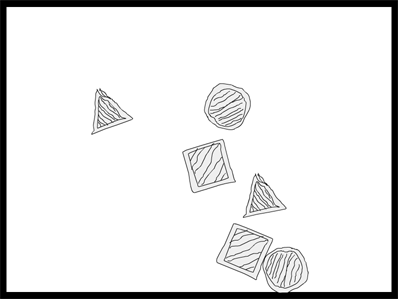
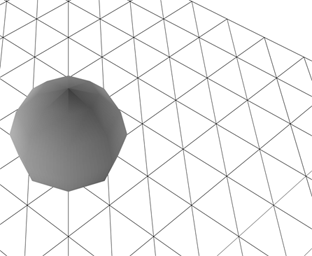
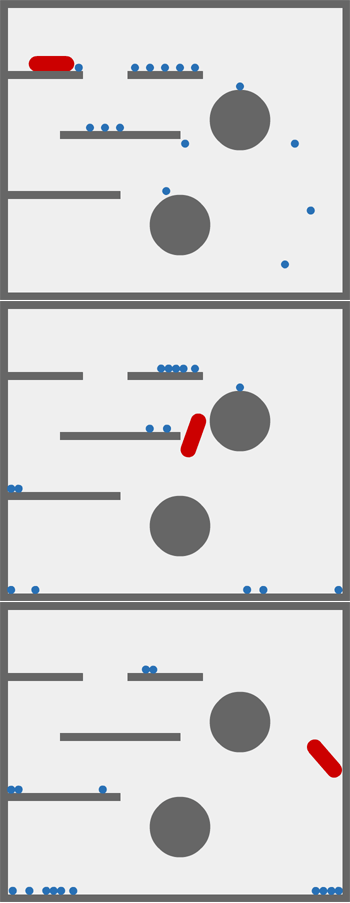
You’ll need this fla to run this snippet since the graphics are in the library. This snippet shows how to easily use linkage classes as the graphics for your rigid bodies. This was actually one of the first features I implemented in QuickBox2D.
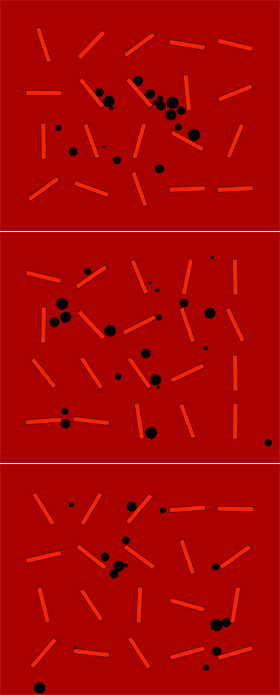
One of the more advanced and useful properties of rigid bodies is the groupIndex. It allows you to specify which rigid bodies collide with one another and which rigid bodies pass through one another. This snippit demo’s the groupIndex property. For more information take a look at what the Box2D manual says.
This snippet shows XML that the mini-library AsXML can read and run – in this case AsXML is set up to run with Papervision
A few days ago I had the idea to write some code that would run ActionScript based on XML. I spent some time getting rid of a few bugs and setting up some demos with TweenLite, Papervision and QuickBox2D. I wrapped everything up into a mini-library called AsXML.
AsXML Features:
1) call methods of the main timeline
2) read and write properties on the main timeline
3) instantiate classes on the main timeline
4) call methods on these classes
5) read and write properties on these classes
6) store references to return values from functions
import com.actionsnippet.qbox.*;
import Box2D.Common.Math.*;

// try altering your frame rate
[SWF(backgroundColor=0x000000, width=700, height=600, frameRate=30)]
// try setting frim to false
var sim:QuickBox2D = new QuickBox2D(this, {iterations:20, timeStep:1 / 60, frim:true});

sim.setDefault({fillColor:0x003366, lineAlpha:0});
sim.createStageWalls();

sim.addBox({x:10, y:18, height:3, density:0});

sim.setDefault({fillColor:0x004466, lineColor:0x2B80F5});

var cVel:b2Vec2 = new b2Vec2();

for (var i:int = 0; i<32; i++){
	var c:QuickObject = sim.addCircle({x:13 + i % 8, y:10 + int(i / 8), friction:0.01, radius:0.2 + Math.random()*0.3, angularDamping:1});
	cVel.x = Math.random() * 4 - 2;
	cVel.y = Math.random() * 4 - 2;
	c.body.SetLinearVelocity(cVel);
}

var box:QuickObject = sim.addBox({x:3, y:16, width:2, height: 2});
var boxVel:b2Vec2 = new b2Vec2(15, -25);

sim.start();

// shoot the box from left to right
setTimeout(positionBox, 200);
function positionBox():void{
	// reset box position
	box.x = 3, box.y = 16;
	setTimeout(shootBox, 500);
}
function shootBox():void{
	box.body.SetLinearVelocity(boxVel);
	box.body.SetAngularVelocity(10);
	// shoot the box again
	setTimeout(positionBox, 4000);
}
You’ll need to download the latest version of QuickBox2D in order to run this snippet (alpha 107 as of this post). I recommend checking out the demo below first though…
The most notable feature of this release is FRIM (frame rate independent motion). FRIM is used to attempt to keep the speed of the Box2D simulation constant no matter what frame rate the swf is running at. This is good because frame rates will vary from browser to browser and from computer to computer.
Mr.Doob suggested that I implement this feature in QuickBox2D. If you haven’t seen his site I highly recommend checking it out – really great stuff there.
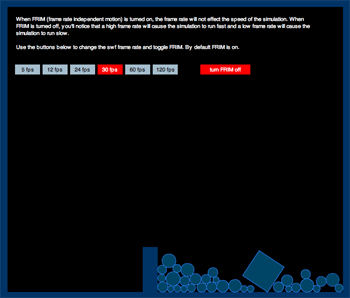
I created a demo to illustrate the FRIM feature… this demo is basically the same as the above snippet with a few extra buttons added to control frame rate and toggle FRIM.
While this new feature seems to be working, I believe there still may be room for improvement. Please let me know if the demo doesn’t work correctly on your machine. As of now, I’ve only tested it on my 2.5 Ghz Intel Core 2 Duo.
Also, any suggestions to improve the clarity of this demo are appreciated… I found it kind of hard to think of a good demo to show FRIM in action. The original demo really didn’t make much sense… so I gave Rich Shupe a call and he helped me come up with the idea for the current demo.
UPDATE: I just updated the demo so that the simulation restarts when you change the frame rate (as per Mr.doob’s suggestion below)
This works with the current version of QuickBox2D…. tomorrow I’ll be uploading the new version of QuickBox2D which supports FRIM (frame rate independent motion) and contains a few additional minor tweaks and fixes.
// note the high framerate for testing purposes
[SWF(width = 800, height = 600, frameRate=60)]
// red, yellow, blue
var fills:Vector.<IGraphicsData> = Vector.<IGraphicsData>([new GraphicsSolidFill(0xFF0000),  new GraphicsSolidFill(0xFFCC00), new GraphicsSolidFill(0x0033FF)]);

var stroke:IGraphicsData = new GraphicsStroke();

var cmds:Vector.<int> = new Vector.<int>();
var ci:int = 0;
var dat:Vector.<Number> = new Vector.<Number>();
var di:int = 0;
var igraph:Vector.<IGraphicsData> = new Vector.<IGraphicsData>();
var ig:int  = 0;
var path:Vector.<GraphicsPath> = new Vector.<GraphicsPath>();
var boxNum:int = 1500;
var locX:Vector.<Number> = new Vector.<Number>(boxNum);
var locY:Vector.<Number> = new Vector.<Number>(boxNum);
var velX:Vector.<Number> = new Vector.<Number>(boxNum);
var velY:Vector.<Number> = new Vector.<Number>(boxNum);
var cols:int = 50;
for (var i:int = 0; i<boxNum; i++){
	path[i] = new GraphicsPath(new Vector.<int>(), new Vector.<Number>());
	path[i].winding = GraphicsPathWinding.NON_ZERO;
	var theta:Number = i * Math.PI/180;
	var sin:Number = Math.cos(theta);
	var cos:Number =  Math.sin(theta);
	var r:Number = Math.random()*100;
	var vr:Number = r * 0.05;
	velX[i] = vr * cos;
	velY[i] = vr * sin;
	locX[i] = 400 + r * cos;
    locY[i] = 300 + r * sin;
}

// box vars
var xp:Number, yp:Number, size:Number, hs:Number;
// corners
var x0:Number, y0:Number, x1:Number, y1:Number;

addEventListener(Event.ENTER_FRAME, onLoop);
function onLoop(evt:Event):void {
	graphics.clear();
	ig = 0;
	for (i= 0; i<boxNum; i++){
		// inline function:
		locX[i] += velX[i];
		locY[i] += velY[i];
		xp = locX[i];
		yp = locY[i];
		if (xp < 0 || xp > 800){
			velX[i] *= -1;
		}
		if (yp < 0 || yp > 600){
			velY[i] *= -1;
		}
		size = 10 + i % 10;
		hs = size * 0.5;
		x0 = xp - hs, y0 = yp - hs;
		x1 = xp + hs, y1 = yp + hs;
		ci = 0;
		di = 0;
		cmds = path[i].commands;
		dat = path[i].data;
		// GraphicsPathCommand.MOVE_TO
		cmds[ci++] = 1;
		dat[di++] = x0 , dat[di++] = y0;
		// GraphicsPathCommand.LINE_TO
		cmds[ci++] = 2;
		dat[di++] = x1 , dat[di++] = y0;
		// GraphicsPathCommand.LINE_TO
		cmds[ci++] = 2;
		dat[di++] = x1 , dat[di++] = y1;
		// GraphicsPathCommand.LINE_TO
		cmds[ci++] = 2;
		dat[di++] = x0 , dat[di++] = y1;
		// end inline function

		path[i].commands = cmds;
		path[i].data = dat;
		igraph[ig++] = fills[i % 3];
		igraph[ig++] = path[i];
	}
	// everything is drawn with one function call
    graphics.drawGraphicsData(igraph);
}
I haven’t spent much time with IGraphicsData. It’s a very cool feature and I think its going to take me awhile to realize its full potential. Since I have to start somewhere I decided to write this snippet to show that it is rather fast. I also recalled reading some benchmark info for the new fp10 graphics stuff over at bytearray.org…. pretty nice info there…
This snippet is pretty optimized, there are a few areas (such as the recurring population of the cmds Vector) that could be optimized more but are left this way for SOME flexibility.
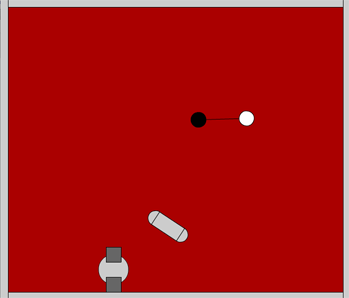
import com.actionsnippet.qbox.*;

[SWF (backgroundColor=0xAA0000, width=700, height=600, frameRate=60)]

var sim:QuickBox2D = new QuickBox2D(this);

sim.createStageWalls();

/**
create a dancing pill
*/
// all x and y coords are relative to the center of the group
var partA:QuickObject = sim.addCircle({x:-1, y:0, radius:0.5, restitution:.9});
var partB:QuickObject = sim.addCircle({x:1, y:0, radius:0.5, restitution:.9});
var partC:QuickObject = sim.addBox({x:0, y:0, width:2, height:1});
// all the parts are passed into the objects array
// addGroup() groups the parts together into one rigid body
var pill:QuickObject = sim.addGroup({objects:[partA, partB, partC], x:3, y:3, angle:0.3});

/**
create another group
*/
partA = sim.addCircle({x:0, y:0, radius:1});
partB = sim.addBox({x:0, y:1, width:1, height:1, fillColor:0x666666});
partC = sim.addBox({x:0, y:-1, width:1, height:1, fillColor:0x666666});
sim.addGroup({objects:[partA, partB, partC], x:8, y:3, angle:0.3});

/**
create two circles linked together by a stretchy joint
*/
partA = sim.addCircle({x:15, y:3, fillColor:0x000000, anglularDamping:1});
partB = sim.addCircle({x:17, y:3, fillColor:0xFFFFFF, anglularDamping:1});
// if x1, y1, x2 and y2 properties are not set, the joint is automatically placed
// at the b2Body's center
sim.addJoint({a:partA.body, b:partB.body, frequencyHz:1});

sim.start();
sim.mouseDrag();
You’ll need QuickBox2D Alpha 106 to run this… This snippet demo’s the addGroup() method, which allows for easy grouping of shapes. I updated the docs today to feature a simple explanation of how this works.
import com.actionsnippet.qbox.*;

[SWF(backgroundColor=0x000000, width=700, height=600)]

var sim:QuickBox2D = new QuickBox2D(this);

sim.setDefault({fillColor:0x003366, lineColor:0x2B80D5});
sim.createStageWalls();

var i:int = 0;
for (i= 0; i<10; i++){
  sim.addCircle({x:5 + i, y:7, radius:0.3, linearDamping:1, angularDamping:1, fillColor:0x78B4C2, isBullet:true});
}

for (i= 0; i<2; i++){
	var poly:Array = [];
	var r:Number = 3;
	var step:Number = Math.PI / 6;
	for (var t:Number = 0; t<=Math.PI; t+=step){
		poly.push(r * Math.cos(t));
		poly.push(r * Math.sin(t));
	}
	r = 2;
	for (t = Math.PI; t >= -step; t-=step){
		poly.push(r * Math.cos(t));
		poly.push(r * Math.sin(t));
	}
	// using points instead of verts causes QuickBox2D to triangulate the polygon
	// the wireframe boolean changes rendering style for polys
	sim.addPoly({x:4 + i *7, y:16, points:poly, wireframe:Boolean(i), linearDamping:1.5, angularDamping:1});
}

sim.start();
sim.mouseDrag();
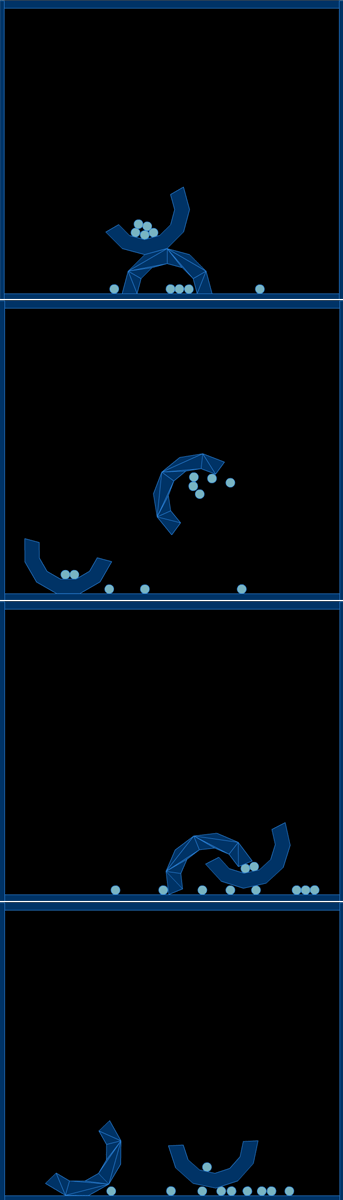
I just uploaded QuickBox2D Alpha 106 which includes a few bug fixes and support for compound shapes and easier polys. I used the algorithm from yesterdays post to significantly simplify the way QuickBox2D handles the description of polygons.
You’ll need QuickBox2D Alpha 106 or greater, if you want to test this….
This triangulation is really better suited for 3D stuff – Box2D supports multiple convex polygons in one rigid body… this algorithm makes more shapes (triangles) than Box2D needs – I’ll probably swap out the algorithm in the near future.
Tomorrow I’ll be posting a demo about the way QuickBox2D simplifies compound shapes. I have yet to update the docs to include the new features of Alpha 106. That will happen along with tomorrows post.
// from http://codebase.dbp-site.com/code/find-difference-between-two-angles-25
function angleDifference(angle0:Number, angle1:Number):Number{
	return Math.abs((angle0 + 180 -  angle1) % 360 - 180);
}

trace("get the angle between:");
trace("350 and 10 =", angleDifference(350, 10));
trace("180 and -1 =", angleDifference(180, -1));
trace("-10 and 5 =", angleDifference(-10, 5));
trace("725 and -45 =", angleDifference(725, -45));
/* outputs:
get the angle between:
350 and 10 =  20
180 and -1 =  179
-10 and 5 =  15
725 and -45 =  50
*/
This snippet shows an easy way to find the difference between two angles. The tricky part about doing this is finding the difference between something like 350 and 1 (which should be 11).
Over the years I have done this a few different ways – I needed it for something today and realized that my way was a tad clunky (had a little redundant logic) – So with a quick google search I found a more elegant solution.