Browse the notebook

Category: QuickBox2D

QuickBox2D Floating Walker

import com.actionsnippet.qbox.*;
import Box2D.Common.Math.*;
import Box2D.Dynamics.Joints.*;

[SWF (backgroundColor=0x000000, width=700, height=600, frameRate=60)]

var sim:QuickBox2D = new QuickBox2D(this, {gravityY:.2});

sim.setDefault({fillColor:0xEFEFEF, fillAlpha:0.5, lineColor:0xFFFFFF});

sim.createStageWalls();

for (var i:int = 0; i<20; i++){
	sim.addCircle({x:1+i, y:1, radius:0.2, restitution:1});
}

var head:QuickObject = sim.addCircle({x:0, y:0, radius:0.5});
var neck:QuickObject = sim.addBox({x:0, y:1, width:0.5, height:2});
var top:QuickObject = sim.addGroup({objects:[head, neck], x:10, y:5, fixedRotation:true});

var upperLegA:QuickObject = sim.addBox({x:10, y:7.5, width:0.25, height:1.5,groupIndex:-2});
var lowerLegA:QuickObject = sim.addBox({x:10, y:9, width:0.25, height:1.5,groupIndex:-2});

var upperLegB:QuickObject = sim.addBox({x:10, y:7.5, width:0.25, height:1.5,groupIndex:-2});
var lowerLegB:QuickObject = sim.addBox({x:10, y:9, width:0.25, height:1.5,groupIndex:-2});

var anchor:b2Vec2 = new b2Vec2();
function connect(a:QuickObject, b:QuickObject, lower:Number, upper:Number, offX:Number=0, offY:Number = 0):QuickObject{
	 var min:Number = Math.min(a.y, b.y);
     var max:Number = Math.max(a.y, b.y);
     anchor.y = min + (max - min) * 0.5 + offY;
     min = Math.min(a.x, b.x);
     max = Math.max(a.x, b.x);
     anchor.x = min + (max - min) * 0.5 + offX;
	 return sim.addJoint({a:a.body, b:b.body, x1:anchor.x, y1:anchor.y, lowerAngle:lower, upperAngle:upper});
}

sim.setDefault({type:"revolute", collideConnected:false, enableLimit:true, enableMotor:true, maxMotorTorque:250, lineColor:0xFFFFFF});

var upperLegAJoint:QuickObject = connect(top, upperLegA, -1, 1, 0, 0.8);
var upperLegBJoint:QuickObject = connect(top, upperLegB, -1, 1, 0, 0.8);

var lowerLegAJoint:QuickObject = connect(upperLegA, lowerLegA, -1, 1);
var lowerLegBJoint:QuickObject = connect(upperLegB, lowerLegB, -1, 1);

sim.start();
sim.mouseDrag();
 

var j:b2RevoluteJoint;
var t:Number = -Math.PI * 0.5;
addEventListener(Event.ENTER_FRAME, onLoop);
function onLoop(evt:Event):void {
	
	var s1:Number = 1*Math.sin(t);
	var s2:Number = 1*Math.sin(t+Math.PI);
	t+= 0.05;
	
	top.body.SetAngularVelocity(s1 * 0.25);
	
	j =  upperLegAJoint.joint as b2RevoluteJoint;
    j.SetMotorSpeed(s1);
	
	j =  upperLegBJoint.joint as b2RevoluteJoint;
    j.SetMotorSpeed(s2);
	 
	j = lowerLegAJoint.joint as b2RevoluteJoint;
	j.SetMotorSpeed(-s2);
	
	j = lowerLegBJoint.joint as b2RevoluteJoint;
	j.SetMotorSpeed(-s1);
}

Experimenting with primitive robot designs… this was just an improvised design – it looks like it may make sense to break out a pencil and some paper – or my wacom… to get something interesting…
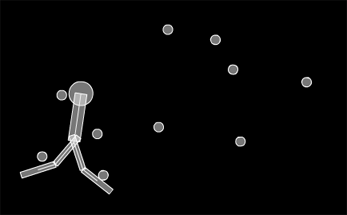
Have a look at the swf…


Read snippet: QuickBox2D Floating Walker

QuickBox2D Prismatic Joint

import com.actionsnippet.qbox.*;
import Box2D.Common.Math.*;

[SWF (backgroundColor=0x000000, width=700, height=600, frameRate=60)]

var sim:QuickBox2D = new QuickBox2D(this);

sim.setDefault({fillColor:0xCCCCCC, lineColor:0x3355AA});

sim.createStageWalls();

var box:QuickObject = sim.addBox({x:10, y:10, density:0});
var circle:QuickObject = sim.addCircle({x:10, y:13});

sim.addJoint({type:"prismatic", a:box.body, b:circle.body, axis:new b2Vec2(1, 0), upperTranslation:3, lowerTranslation:-3, enableLimit:true, motorSpeed:10, maxMotorForce:10, enableMotor:true});

sim.start();
sim.mouseDrag();

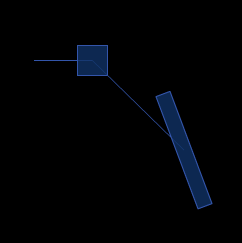
Simple prismatic joint demo. Prismatic joints are odd, it took me awhile to realize how to use them and what they can be used for… Plan on using them in the creation of some Box2D machines in the near futrure…

Check out the swf

Read snippet: QuickBox2D Prismatic Joint

QuickBox2D Gear Joint

import com.actionsnippet.qbox.*;
import Box2D.Common.Math.*;

[SWF (backgroundColor=0x000000, width=700, height=600)]

var sim:QuickBox2D = new QuickBox2D(this,{gravityY:10});

sim.setDefault({fillColor:0x113366, fillAlpha:0.8, lineColor:0x3355AA});
sim.createStageWalls();

var boxA:QuickObject = sim.addBox({x:10, y:8, width:4, height:0.5, density:10});
var boxB:QuickObject = sim.addBox({x:5, y:5, density:10});
boxB.body.SetLinearVelocity(new b2Vec2(5, 0));
 
var rev1:QuickObject = sim.addJoint({type:"revolute", a:sim.w.GetGroundBody(), b:boxA.body, anchor:boxA.body.GetWorldCenter()})
			
var rev2:QuickObject = sim.addJoint({type:"prismatic", a:sim.w.GetGroundBody(), axis:new b2Vec2(1, 0), b:boxB.body, anchor:boxB.body.GetWorldCenter()})
																					 
sim.addJoint({type:"gear", a:boxA.body, b:boxB.body, joint1:rev1.joint, joint2:rev2.joint});
			 
sim.start();
sim.mouseDrag();

Simple gear joint demo – meant to serve as a reference for QuickBox2D…


Have a look at the swf…

Read snippet: QuickBox2D Gear Joint

QuickBox2D Connect to GroundBody

import com.actionsnippet.qbox.*;

[SWF (backgroundColor=0x000000, width=700, height=600)]

var sim:QuickBox2D = new QuickBox2D(this);

sim.setDefault({fillColor:0x113366, fillAlpha:0.8, lineColor:0x3355AA});

sim.createStageWalls();

var boxA:QuickObject = sim.addBox({x:10, y:8, width:4, height:0.5, angularDamping:1});
var boxB:QuickObject = sim.addBox({x:7, y:8, width:3, height:0.25, angle:-.5, angularDamping:1});
var boxC:QuickObject = sim.addBox({x:12, y:2, width:2, height:1});

var rev:QuickObject = sim.addJoint({type:"revolute", a:boxA.body, b:sim.w.GetGroundBody()});
// add a red dot to boxA
with (boxA.userData.graphics) lineStyle(), beginFill(0xFF0000), drawCircle(0,0,2);

var rev2:QuickObject = sim.addJoint({type:"revolute", a:boxB.body, b:sim.w.GetGroundBody()});
with (boxB.userData.graphics) lineStyle(), beginFill(0xFF0000), drawCircle(0,0,2);

sim.start();
sim.mouseDrag();

In order to use gear joints (covered in tomorrows post) you’ll need to know how to connect to the ground body…

Check out the swf…

Read snippet: QuickBox2D Connect to GroundBody

QuickBox2D Revolute Walker

import com.actionsnippet.qbox.*;
import Box2D.Dynamics.Joints.*;

[SWF (backgroundColor=0x222222, width=700, height=600)]

var sim:QuickBox2D = new QuickBox2D(this);
 
sim.setDefault({fillColor:0x000000, lineColor:0xCCCCCC});
sim.createStageWalls();

var legA:QuickObject = sim.addBox({x:5, y:11, width:2, height:0.2,groupIndex:-2});
var three:QuickObject = sim.addBox({x:6.8 + 1.8, y:11, width:2, height:0.2,groupIndex:-2});
var legB:QuickObject = sim.addBox({x:6.8, y:11, width:2, height:0.5,groupIndex:-2});
sim.setDefault({type:"revolute"});

var anchorX:Number = legA.x + (legB.x - legA.x) / 2;
var anchorY:Number = legA.y;
var revJointA:QuickObject = sim.addJoint({a:legA.body, b:legB.body, x1:anchorX, y1:anchorY,enableMotor:true, maxMotorTorque:80});

anchorX = legB.x + (three.x - legB.x) / 2;

var revJointB:QuickObject = sim.addJoint({a:legB.body, b:three.body, x1:anchorX, y1:anchorY, enableMotor:true, maxMotorTorque:80});

setWalkDir(6);
addEventListener(Event.ENTER_FRAME, onLoop);
function onLoop(evt:Event):void {
  if (legB.x < 4){
	setWalkDir(6);  
  }else if (legB.x > 19){
	setWalkDir(-6);  
  }
}
function setWalkDir(dir:Number):void{
	var j:b2RevoluteJoint;
	j = revJointA.joint as b2RevoluteJoint
	j.SetMotorSpeed(dir);
	j = revJointB.joint as b2RevoluteJoint
	j.SetMotorSpeed(dir * -1);
}

sim.start();
sim.mouseDrag();

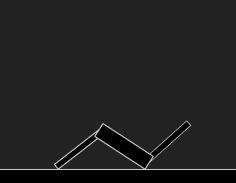
This demo is a bit more complex than the last two – mostly because it makes use of motors…


Have a look at the swf…

Read snippet: QuickBox2D Revolute Walker

QuickBox2D Pulley Joint

import com.actionsnippet.qbox.*;
import Box2D.Common.Math.*;

[SWF (backgroundColor=0x000000, width=700, height=600)]

var sim:QuickBox2D = new QuickBox2D(this);

sim.setDefault({fillColor:0x113366, fillAlpha:0.8, lineColor:0x3355AA});

sim.createStageWalls();

var boxA:QuickObject = sim.addBox({x:10, y:8, fixedRotation:true});
var boxB:QuickObject = sim.addBox({x:14, y:8, width:2,  fixedRotation:true});

sim.addJoint({type:"pulley", a:boxA.body, b:boxB.body, groundAnchor1:new b2Vec2(boxA.x, 2), groundAnchor2:new b2Vec2(boxB.x, 2)});

sim.start();
sim.mouseDrag();

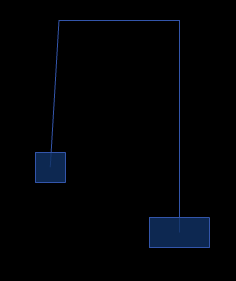
QuickBox2D pulley joint demo. This post is really meant to serve as part of the docs so it may seem a bit boring in its simplicity…

Have a look at the swf…

Read snippet: QuickBox2D Pulley Joint

QuickBox2D Revolute Ragdoll

import com.actionsnippet.qbox.*;
import Box2D.Common.Math.*;

[SWF (backgroundColor=0x000000, width=700, height=600, frameRate=60)]

var sim:QuickBox2D = new QuickBox2D(this,{debug:false, frim:true, gravityY:1});

sim.setDefault({fillColor:0x113366, fillAlpha:0.8, lineColor:0x3355AA});

sim.createStageWalls();

var circle:QuickObject = sim.addCircle({x:10, y:10, radius:3});
var head:QuickObject = sim.addCircle({x:5, y:5, radius:0.5});
var torsoA:QuickObject = sim.addBox({x:5, y:6, width:1.5, height:0.8})
var torsoB:QuickObject = sim.addBox({x:5, y:6.5, width:1.25, height:0.8})
var torsoC:QuickObject = sim.addBox({x:5, y:7, width:1.0, height:0.8})
var pelvis:QuickObject = sim.addBox({x:5, y:7.5, width:1.0, height:0.8})
var leftLegA:QuickObject = sim.addBox({x:4.75, y:8.5, width:0.4, height:1.75});
var leftLegB:QuickObject = sim.addBox({x:4.75, y:9.75, width:0.4, height:1.5});
var rightLegA:QuickObject = sim.addBox({x:5.29, y:8.5, width:0.4, height:1.75});
var rightLegB:QuickObject = sim.addBox({x:5.29, y:9.75, width:0.4, height:1.5});
var leftArmA:QuickObject = sim.addBox({x:3.6, y:5.8, width:1.3, height:0.35});
var leftArmB:QuickObject = sim.addBox({x:2.5, y:5.8, width:1.25, height:0.35});
var rightArmA:QuickObject = sim.addBox({x:6.4, y:5.8, width:1.3, height:0.35});
var rightArmB:QuickObject = sim.addBox({x:7.5, y:5.8, width:1.25, height:0.35});

torsoA.body.SetLinearVelocity(new b2Vec2(0, 50));

var anchor:b2Vec2 = new b2Vec2();
function connect(a:QuickObject, b:QuickObject, lower:Number, upper:Number, offX:Number=0, offY:Number = 0):QuickObject{
	 var min:Number = Math.min(a.y, b.y);
     var max:Number = Math.max(a.y, b.y);
     anchor.y = min + (max - min) * 0.5 + offY;
     min = Math.min(a.x, b.x);
     max = Math.max(a.x, b.x);
     anchor.x = min + (max - min) * 0.5 + offX;
	return sim.addJoint({a:a.body, b:b.body, x1:anchor.x, y1:anchor.y, lowerAngle:lower, upperAngle:upper});
}

sim.setDefault({type:"revolute", collideConnected:false, enableLimit:true, lineColor:0xFFFFFF});

connect(head, torsoA, -.2, .2);
connect(torsoA, torsoB,-.2, .2);
connect(torsoC, torsoB,-.2, .2);
connect(torsoC, pelvis,-.2, .2);

connect(pelvis, leftLegA, -1, 1, 0, -0.5);
connect(leftLegA, leftLegB, -1, 1);

connect(pelvis, rightLegA, -1, 1, 0, -0.5);
connect(rightLegA, rightLegB, -1, 1);

connect(torsoA, leftArmA, -2, 1);
connect(leftArmA, leftArmB, -2, 1);

connect(torsoA, rightArmA, -1, 2)
connect(rightArmA, rightArmB, -1, 2)

sim.start();
sim.mouseDrag();
 

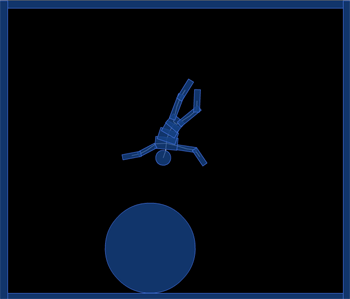
QuickBox2D alpha 108 is finally finished and different types of joints are now possible. I’ll be auto-posting joint demos over the next few days for each type of Box2D joint. Box2D joints are pretty confusing, I struggled a bit to decide on a good way to handle them in QuickBox2D, any suggestions are welcome.


Have a look at the swf:

Read snippet: QuickBox2D Revolute Ragdoll

QuickBox2D Skinning

import com.actionsnippet.qbox.*;

var sim:QuickBox2D = new QuickBox2D(this);

sim.createStageWalls({lineAlpha:0,fillColor:0x000000})
sim.addBox({x:3, y:3, width:3, height:3, skin:BoxSkin});
sim.addCircle({x:3, y:8,radius:1.5,  skin:CircleSkin});
sim.addPoly({x:6, y:3, verts:[[1.5,0,3,3,0,3,1.5,0]], skin:TriangleSkin});

sim.addBox({x:6, y:3, width:3, height:3, skin:BoxSkin});
sim.addCircle({x:6, y:8,radius:1.5,  skin:CircleSkin});
sim.addPoly({x:12, y:3, verts:[[1.5,0,3,3,0,3,1.5,0]], skin:TriangleSkin});

sim.start();
sim.mouseDrag();

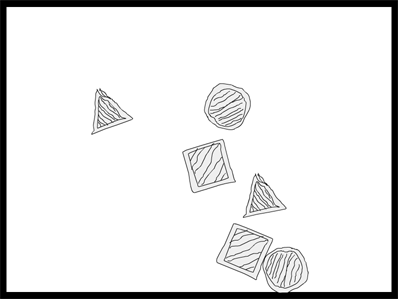
You’ll need this fla to run this snippet since the graphics are in the library. This snippet shows how to easily use linkage classes as the graphics for your rigid bodies. This was actually one of the first features I implemented in QuickBox2D.


Take a look at the swf here…

Read snippet: QuickBox2D Skinning

QuickBox2D groupIndex

import com.actionsnippet.qbox.*;
import Box2D.Common.Math.*;

stage.frameRate = 60;

var sim:QuickBox2D = new QuickBox2D(this);

sim.createStageWalls();

createTraveler(3, 3);

addObstacles();

function addObstacles():void{
	sim.setDefault({groupIndex:-1, density:0, height:0.4});
	sim.addBox({x:6, y:5, width:8, angle:0.17})
    sim.addBox({x:7, y:7.1, width:8, angle:-0.17})
	sim.addBox({x:5, y:9.1, width:8,  angle:0.10})
	sim.addBox({x:6, y:11.5, width:8.9,  angle:-0.20})
	sim.addBox({x:5.5, y:16, width:9, angle:0.20})
	sim.addBox({x:5.5, y:18, width:9})
	sim.addCircle({x:11, y:20, radius:2.5, groupIndex:1});
	sim.addBox({x:16, y:19, width:2, height:2, angle:0.0, groupIndex:1})
}

function createTraveler(x:Number, y:Number):QuickObject{
	var parts:Array = [];
	parts[0] = sim.addCircle({x:0, y:1, radius:0.25, friction:0.01});
	parts[1] = sim.addCircle({x:0, y:3, radius:0.25, friction:0.01});
	parts[2] = sim.addBox({x:0, y:2, width:0.3, height:1.5 , groupIndex:-1});
	return sim.addGroup({objects:parts, x:x, y:y });
}

sim.start();
sim.mouseDrag();

One of the more advanced and useful properties of rigid bodies is the groupIndex. It allows you to specify which rigid bodies collide with one another and which rigid bodies pass through one another. This snippit demo’s the groupIndex property. For more information take a look at what the Box2D manual says.

Take a look at the swf here.

Read snippet: QuickBox2D groupIndex

XML to ActionScript #3 (AsXML)

<code>
  <make reference="w" class="BasicView" args="stage.stageWidth, stage.stageHeight, false"/>
  <call method="addChild" args="w"/>
  
  <make reference="wireMat" class="WireframeMaterial" args="0x000000" />
  
  <make reference="sphere" class="Sphere" args="wireMat, 100" />
  
  <call method="w.scene.addChild" args="sphere" />
  
  <make reference="animation" class="Object" >
    <set z="-500" rotationY="360"  rotationX="360" ease="Back.easeOut"/>
  </make>
  
  <call method="TweenLite.to" args="sphere, 3, animation" />
  
  <call method="setInterval" args="w.singleRender, 32" />
  
</code>

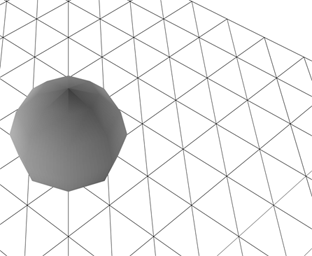
This snippet shows XML that the mini-library AsXML can read and run – in this case AsXML is set up to run with Papervision

A few days ago I had the idea to write some code that would run ActionScript based on XML. I spent some time getting rid of a few bugs and setting up some demos with TweenLite, Papervision and QuickBox2D. I wrapped everything up into a mini-library called AsXML.

Check out the demos here.


Download AsXML and demo files here.

AsXML Features:
1) call methods of the main timeline
2) read and write properties on the main timeline
3) instantiate classes on the main timeline
4) call methods on these classes
5) read and write properties on these classes
6) store references to return values from functions

Read snippet: XML to ActionScript #3 (AsXML)