Browse the notebook

Category: motion

Low Precision Sine and Cosine

var t:Number=0, cos:Number, sin:Number;

var canvas:BitmapData = new BitmapData(400,400,false, 0x000000);
addChild(new Bitmap(canvas));

var shape:Shape = new Shape();
with(shape.graphics) beginFill(0x568338, .2), drawCircle(0,0,10);

addEventListener(Event.ENTER_FRAME, onLoop);
function onLoop(evt:Event):void {
	
	     t += .1;
		// -- low precision sine/cosine
	    //always wrap input angle to -PI..PI
		if (t < -3.14159265){
			t += 6.28318531;
		}else{
		if (t >  3.14159265)
			t -= 6.28318531;
		}
		
		//compute sine
		if (t < 0){
			sin = 1.27323954 * t + .405284735 * t * t;
		}else{
			sin = 1.27323954 * t - 0.405284735 * t * t;
		}
		
		//compute cosine: sin(t + PI/2) = cos(t)
		t += 1.57079632;
		if (t >  3.14159265){
			t -= 6.28318531;
		}
		
		if (t < 0){
			cos = 1.27323954 * t + 0.405284735 * t * t
		}else{
			cos = 1.27323954 * t - 0.405284735 * t * t;
		}
		t -= 1.57079632;
		
		// move the shape
		shape.x = 200 + 100 * cos;
		shape.y = 200 + 100 * sin;
		
		// draw to the canvas
		canvas.draw(shape, shape.transform.matrix);
}

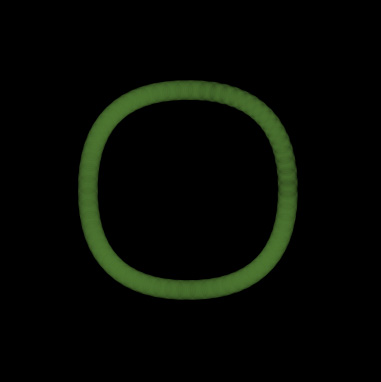
This snippet draws a circle using low precision sine and cosine… you’ll notice that its not a perfect looking circle:

Back in January I saw this blog post by Michael Baczynski over at http://lab.polygonal.de/. The blog post describes a technique for fast sine and cosine approximation – (I highly recommend giving it a read – very fun stuff).

It’s worth noting that there is a higher precision sine and cosine that will likely draw a better looking circle but will be about half as fast. According to the original post … the low precision technique is approximately 14x faster than using Math.cos()/Math.sin().

There some other really great posts over at polygonal go check them out.
Read snippet: Low Precision Sine and Cosine

Circle of Particles #2

[SWF(width = 400, height = 400)];
var canvas:BitmapData = new BitmapData(400,400, false, 0x000000);
var eraser:BitmapData = new BitmapData(400,400, true, 0x11000000);
addChild(new Bitmap(canvas));

var particles:Array = new Array();
for (var i:int = 0; i < 500; i++){
	particles.push(makeParticle());
}

addEventListener(Event.ENTER_FRAME, onLoop);
function onLoop(evt:Event):void {
	canvas.copyPixels(eraser, eraser.rect, new Point(0,0), null, null, true);
	for (var i:int = 0; i < particles.length; i++){
		particles[i]();
	}
}

function makeParticle():Function {
	var dx:Number, dy:Number;
	var x:Number = 200;
	var y:Number = 200;
	var vx:Number = Math.random() * 4 - 2;
	var vy:Number = Math.random() * 4 - 2;
	var ang:Number;
	return function():void {
			  x += vx;
		      y += vy;
		      dx = 200 - x;
		      dy=  200 - y;
			   if (Math.sqrt((dx * dx) + (dy * dy)) > 130){
				ang = Math.atan2(dy, dx) / Math.PI * 180;
				 vx = Math.cos(ang);
				 vy = Math.sin(ang);
			   }
		       canvas.setPixel(x, y, 0xFFFFFF);
	}
}

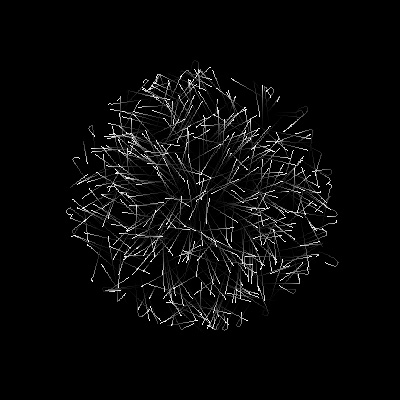
This is an interesting variation on yesterdays post. The result will looks like this…


Click to view swf…

I also decided to do a processing port of this with 3,000 particles:

Processing Version

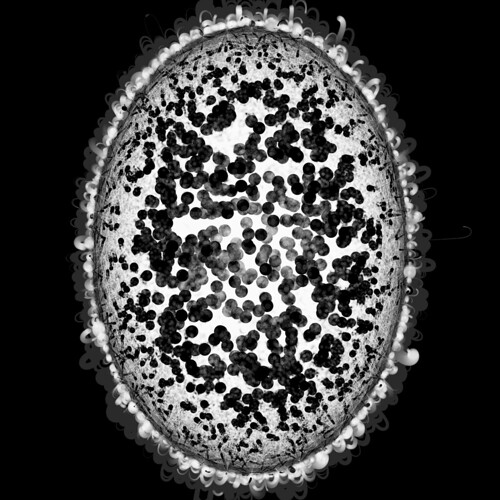
The processing version eventually evolved into this:


Click for enlarged version…

Read snippet: Circle of Particles #2

Circle of Particles

var canvas:BitmapData = new BitmapData(400,400, false, 0xFFFFFF);
addChild(new Bitmap(canvas));
var eraser:BitmapData = new BitmapData(400,400, true, 0x33FFFFFF);

var particles:Array = new Array();
for (var i:int = 0; i < 1000; i++){
	particles.push(makeParticle());
}

addEventListener(Event.ENTER_FRAME, onLoop);
function onLoop(evt:Event):void {
	canvas.copyPixels(eraser, eraser.rect, new Point(0,0), null, null, true);
	for (var i:int = 0; i < particles.length; i++){
		particles[i]();
	}
}

function makeParticle():Function {
	var dx:Number, dy:Number;
	var x:Number = 200;
	var y:Number = 200;
	var vx:Number = Math.random() * 4 - 2;
	var vy:Number = Math.random() * 4 - 2;
	return function():void {
			  x += vx;
		      y += vy;
		      dx = x - 200;
		      dy= y - 200;
			   if (Math.sqrt((dx * dx) + (dy * dy)) > 100){
				 vx *= -1;
				 vy *= -1;
			   }
		       canvas.setPixel(x, y, 0x000000);
	}
}

This creates a circular area filled with moving particles/pixels. It makes use of yesterdays functional programming techniques.

Read snippet: Circle of Particles

Functional Pseudo-Objects

var moverNum:int = 40;
var movers:Array = new Array();

for (var i:int = 0; i<moverNum; i++){
	movers.push(makeMover());
}

addEventListener(Event.ENTER_FRAME, onLoop);
function onLoop(evt:Event):void {
	for (var i:int = 0; i<moverNum; i++){
		movers[i]();
	}
}

function makeMover():Function{
	// mover vars & setup
	var xVel:Number = Math.random() * 5 + 1;
	var right:Number = stage.stageWidth + 30;
	var s:Shape = Shape(addChild(new Shape()));
	with(s.graphics) beginFill(0xFF0000), drawCircle(0,0,5);
	s.x = Math.random() * stage.stageWidth;
	s.y = Math.random() * stage.stageHeight;
	// return a "run" function
	return function():void {
		 s.x += xVel;
		 if (s.x > right){
			s.x = -30; 
		 }
	}
}

This snippet creates 40 shapes that move to the right at a random velocity. When they animate off the right hand side of the stage they return from the left.

The makeMover() function has a series of variable definitions related to the x velocity and position of a Shape. The makeMover() function then returns an anonymous function that contains some logic to move the Shape “s”. The anonymous function has access to the makeMover() functions temporary variables…

On the main loop we run all of the anonymous functions – animating all the shapes by their random x velocities.

It would be interesting to write the same program using classes and test the for speed differences. My assumption is that anonymous functions are expensive, but it would still be interesting to see…

Read snippet: Functional Pseudo-Objects

Parallax Based on Y

[SWF(backgroundColor=0x000000, frameRate=30)]

var elements:Array = new Array();
for (var i:int = 0; i<200; i++){
	var c:MovieClip= MovieClip(addChild(new MovieClip()));
	c.x = Math.random()*(stage.stageWidth + 100) - 50;
	c.y = Math.random()*stage.stageHeight;
	with(c.graphics) lineStyle(2, 0xFFFFFF,3), drawCircle(0,0,2 + c.y / 20);
	c.startX = c.x;
	elements.push(c);
}

var offset:Number = 0;
var t:Number = 0;

addEventListener(Event.ENTER_FRAME, onLoop);
function onLoop(evt:Event):void {
	t+=.1;
	offset = 200 * Math.cos(t);
	for (var i:int = 0; i<elements.length; i++){
	   elements[i].x = elements[i].startX + offset / ((stage.stageWidth - elements[i].y) / 80);
	}
}

I wrote this snippet originally to automatically add parallax motion to a bunch of quick drawings I did within the flash IDE. Each movieClip in the elements array is moved from left to right based on it’s y position. Clips with a higher y value will oscillate more from left to right than clips with lower y values.

Here is the original drawing I used this on.

And here is what the above snippet will create.

Read snippet: Parallax Based on Y

Animate Graphics.lineTo()

// line thickness, line color, start point, end point, divisor, callback
function animateLineTo( thick:Number, col:uint, sp:Point, ep:Point, div:Number=4, callback:Function=null):void {
	 var s:Shape  = Shape(addChild(new Shape()));
	 var ap:Point = sp.clone();
	 div = Math.max(2, div);
	 setTimeout(runLineAnimation, 1000/stage.frameRate, s.graphics , thick , col , sp , ep , ap, div, callback);
}

function runLineAnimation(g:Graphics , thick:Number, col:uint, sp:Point, ep:Point, ap:Point, div:Number, callback:Function):void {
	 ap.x += (ep.x - ap.x) / div;
	 ap.y += (ep.y - ap.y) / div;
	  with(g){
		clear();
		lineStyle(thick, col);
		moveTo(sp.x, sp.y);
		lineTo(ap.x, ap.y);
	  }
	   if (Math.abs(ap.x - ep.x) < 1 && Math.abs(ap.y- ep.y)  < 1){
		   // done
		   if (callback!=null){
			   callback();   
		   }
	   }else{
		    setTimeout(runLineAnimation, 1000/stage.frameRate, g , thick , col , sp , ep , ap, div, callback);
	   }
}
//
// test out the animateLineTo function:
//
var a:Point = new Point(100,100);
var b:Point = new Point(150, 200);
var c:Point = new Point(300, 190);
var d:Point = new Point(280, 90)

animateLineTo(0, 0xFF0000, a, b, 4, line2);

function line2():void{
	animateLineTo(0, 0xFF0000, b, c, 4, line3);
}

function line3():void{
	animateLineTo(0, 0xFF0000, c, d, 4, line4);
}

function line4():void{
	animateLineTo(0, 0xFF0000, d, a, 4);
}

The above demos a function called animateLineTo() that will draw a line using zeno’s paradox.

There are a couple weird/interesting tricks going on here. I’m using setTimeout() over and over rathaer than using setInterval(). This makes it so I don’t need to store an interval id. I’m also using a delay of 1000/stage.frameRate, this attempts to cause the setTimeout() to run at the same frequency as an enter frame would. This is important because having a setTimeout()/setInterval() that is doing animation and attempting to run more frequently than the framerate can cause problems and is a waste of cpu power.

This snippet was spurned by a student question about how to animate a Graphics.lineTo() from point A to point B. Here is the original snippet, which is easier to read and more bare bones:

var p0:Point = new Point(100,100);
var p1:Point = new Point(400,200);
var dp:Point = new Point(p0.x,p0.y);

var s:Sprite = Sprite(addChild(new Sprite()));

addEventListener(Event.ENTER_FRAME, onLoop);
function onLoop(evt:Event):void {
	s.graphics.clear()
	s.graphics.lineStyle(0,0x000000);
	s.graphics.moveTo(p0.x, p0.y);
	s.graphics.lineTo(dp.x, dp.y);
	dp.x += (p1.x - dp.x) / 4;
	dp.y += (p1.y - dp.y) / 4;
}
Read snippet: Animate Graphics.lineTo()

Snap to Grid

[SWF(width = 600, height = 400)]

// draw the same grid as yesterday
var tileSize:int = 40;
var cols:int = stage.stageWidth / tileSize;
var rows:int = stage.stageHeight / tileSize;
var grid:Sprite = Sprite(addChild(new Sprite()));
grid.graphics.lineStyle(0,0x000000);
var i:int = 0;
for (i = 1; i<cols; i++){
	var posX:Number = i * tileSize
	grid.graphics.moveTo(posX, 0);
	grid.graphics.lineTo(posX, stage.stageHeight);
}
for (i = 1; i<rows; i++){
	var posY:Number = i * tileSize
	grid.graphics.moveTo(0, posY);
	grid.graphics.lineTo(stage.stageWidth, posY);
}

//
// -- add a circle that snaps to the grid when dragged
//
var circle:Sprite = Sprite(addChild(new Sprite()));
with (circle.graphics) beginFill(0xFF0000), drawCircle(0,0,10);
circle.x = circle.y =  tileSize * 3;
circle.buttonMode = true;

circle.addEventListener(MouseEvent.MOUSE_DOWN, onDown);
function onDown(evt:MouseEvent):void {
	addEventListener(Event.ENTER_FRAME, onRunSnapping);
}

function onRunSnapping(evt:Event):void {
	circle.x =  Math.round(mouseX / tileSize) * tileSize;
	circle.y =  Math.round(mouseY / tileSize) * tileSize;
}

stage.addEventListener(MouseEvent.MOUSE_UP, onUp);
function onUp(evt:MouseEvent):void {
	removeEventListener(Event.ENTER_FRAME, onRunSnapping);
}

This builds on yesterdays post by adding a draggable red circle that snaps to the grid. This is the real trick:

circle.x =  Math.round(mouseX / tileSize) * tileSize;
circle.y =  Math.round(mouseY / tileSize) * tileSize;
Read snippet: Snap to Grid

Simple BlendMode Nav

stage.frameRate=30;
var nav:Sprite = Sprite(addChild(new Sprite()));
nav.x=nav.y=150;

var cover:Sprite;
var coverDest:Number=0;
var spacing:int=4;
var btnNum:int=6;

buildNav();

addEventListener(Event.ENTER_FRAME, onLoop);

function onLoop(evt:Event):void {
	cover.x += (coverDest - cover.x) /4;
}

function buildNav():void {
	for (var i:int = 0; i<btnNum; i++) {
		var b:Sprite=makeBox(50,50);
		b.x = i * (b.width + spacing);
		b.buttonMode=true;
		b.addEventListener(MouseEvent.CLICK, onClick);
	}
	cover=makeBox(54, 60);
	cover.blendMode=BlendMode.INVERT;
}

function onClick(evt:MouseEvent):void {
	coverDest=evt.currentTarget.x;
}

function makeBox(w:Number, h:Number) {
	var b:Sprite = new Sprite();
	with (b.graphics) {
		beginFill(0x000000),drawRect(-w/2,-h/2,w,h);
	}
	nav.addChild(b);
	return b;
}

This is something I do in my intermediate flash classes… the only difference is that we do the graphics in the flash IDE during class time instead of drawing them with ActionScript.

Read snippet: Simple BlendMode Nav

Not a Snippet (wandering robots)

package {
	import flash.display.Sprite;
    
    [SWF(width=500, height=500, backgroundColor=0xEFEFEF, frameRate=30)]
	public class Main extends Sprite{
		private var _robotManager:RobotManager;
		public function Main(){
		  _robotManager = new RobotManager(this, 12);
		}
	}
}

class RobotManager{
	
	private var _robots:Array;
	private var _top:Sprite;
	private var _robotNum:int;
	
    public function RobotManager(top:Sprite, robotNum:int){
    	_top = top;
    	_robotNum = robotNum;
    	_robots = new Array();
    	setupRobots();
    	top.addEventListener(Event.ENTER_FRAME, onRun);
    }
    
    private function setupRobots():void{
    	for (var i:int = 0; i<_robotNum; i++){
    		_robots[i] = new Robot();
    		_robots[i].x = 100+(i % 3) * 150;
    		_robots[i].y = 100+int(i / 3) * 100;
    		_robots[i].addEventListener("death", onRobotDie);
    		_top.addChild(_robots[i]);
    	}
    }
    private function onRobotDie(evt:Event):void{
    	for (var i:int = 0; i<_robotNum; i++){
    		if (_robots[i] == evt.currentTarget){
    			_robots.splice(i, 1);
    		}
    	}
    	_robotNum--;
    }
    
    private function onRun(evt:Event):void{
    	collisions();
    }
    
    private function collisions():void{
    	var currBot:Robot;
    	for (var i:int = 0; i<_robotNum; i++){
    		currBot = _robots[i];
    		for (var j:int = 0; j<_robotNum; j++){
    			if (currBot != _robots[j]){
    				var dx:Number = currBot.x - _robots[j].x;
    				var dy:Number = currBot.y - _robots[j].y;
    				if (Math.sqrt((dx * dx) + (dy * dy)) < 40){
    					currBot.die();
    				}
    			}
    		}
    	}
    }
}

import flash.display.*
import flash.events.*;

class Robot extends Sprite{
	private var _inc:Number
	private var _td:Number;
	private var _theta:Number;
	private var _rad:Number;
	
	public function Robot(){
		_theta = Math.random() * (Math.PI * 2);
		_td = _theta;
		_inc = Math.random() * .2 + .05;
		_rad = _inc * 10;
		with(graphics){
			beginFill(0x666666);
			drawRect(-10,-10,20,20);
			endFill();
			beginFill(0x333333);
			drawRect(-5, -5, 20, 10);
			lineStyle(0,0xAAAAAA);
			endFill();
			drawCircle(0,0,20);
		}
		addEventListener(Event.ENTER_FRAME, onRun);
	}
	
	private function onRun(evt:Event):void{
		_td  += _inc;
		_theta += _inc * Math.cos(_td);
		if (x < 0 || y < 0 || x > 500 || y > 500){
			_theta += Math.PI;
		}
		x += _rad * Math.cos(_theta);
		y += _rad * Math.sin(_theta);
		rotation = _theta / Math.PI * 180;
	}
	
	public function die():void{
		removeEventListener(Event.ENTER_FRAME, onRun);
		addEventListener(Event.ENTER_FRAME, onDie);
	}
	
	private function onDie(evt:Event):void{
		scaleX = scaleY += .1;
		alpha -= .1;
		if (scaleX > 2){
			removeEventListener(Event.ENTER_FRAME, onDie);
			if (parent){
				parent.removeChild(this);
				dispatchEvent(new Event("death"));
			}
		}
	}
}

This code should be placed in a document class… not the timeline (hopefully you already know that)

The above creates 12 wandering robots that die when they collide with one another.

This is not a snippet really… but it’s only slightly over 100 lines and it contains a few tricks I find myself using from time to time.

You can view the swf here.

Read snippet: Not a Snippet (wandering robots)

Animate Along Bezier Curve

var circle:Shape = Shape(addChild(new Shape));
with(circle.graphics) beginFill(0x000000), drawCircle(0,0,5);
 
var bezierPoint:Point = new Point();
function bezier(a:Number, x1:Number, y1:Number, x2:Number, y2:Number, x3:Number, y3:Number):void {
		var b:Number =1-a;
		var pre1:Number=a*a;
		var pre2:Number=2*a*b;
		var pre3:Number=b*b;
		bezierPoint.x = pre1*x1 + pre2*x2  + pre3*x3;
	    bezierPoint.y = pre1*y1 + pre2*y2 + pre3*y3;
}

var inc:Number = 0;
var theta:Number = 0;

addEventListener(Event.ENTER_FRAME, onLoop);
function onLoop(evt:Event):void {
	
	 graphics.clear();
	 graphics.lineStyle(0,0xFF0000);
     graphics.moveTo(200,200);
     graphics.curveTo(mouseX, mouseY, 400, 200);

	theta+= .05;
	inc = .5 + .5*Math.sin(theta);
 
	bezier(inc, 200, 200, mouseX, mouseY, 400, 200);
	circle.x = bezierPoint.x;
	circle.y = bezierPoint.y;
}

The above animates a circle along a quadratic bezier curve. This snippet was written in response to a question spurned by some of the recent bezier posts. I used Math.sin() to animate the circle but you could just as easily use modulus… simply replace lines 25-26 with the following:

inc += .03;
inc %= 1;
Read snippet: Animate Along Bezier Curve